Showing posts with label ice cream. Show all posts

Tuesday, April 05, 2011

TWD: Cinnamon Ice Cream Tart

This week's TWD recipe, for a Coffee Ice Cream Tart, can be divided into two categories: things I did differently, and things I wish I'd done differently.

In the "Things I Did Differently" camp, we have the ice cream itself. Instead of doctoring up store-bought coffee ice cream with ground almonds (??) I made my very favorite recipe for cinnamon ice cream (found below). The ice cream is delicious. I have no regrets. You can keep your ground almonds!


In the "Things I Wish I'd Done Differently" category, we have...the rest of the tart. Sorry to say, the ice cream was totally the best part of this for me. The crust was way too hard, the almond flavor was too strong, and the layer of melted chocolate between the crust and the ice cream nearly shattered a molar. I was left gnawing on my crust like a crazed rodent. Not a good look.


On the bright side, I got to play around with piping some ganache on top, and I also had some candied flowers lying around (yes, I know my life is ridiculous) so I primped the tart for a little photo shoot. "You look maaaahvelous, dahling!" (Candied Flowers photo tutorial here.)


So, I'm not in love, but I can't be mad because any recipe that gives me an excuse to make cinnamon ice cream--and then lick said ice cream from inedible tart crust--is okay in my book.


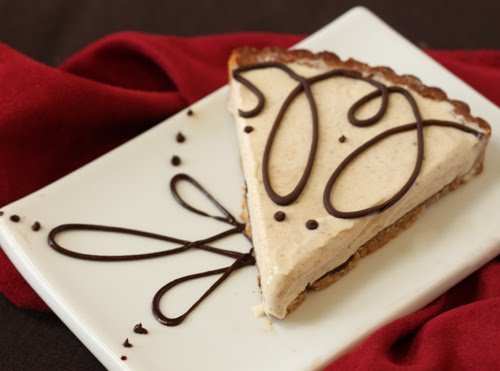
For the original recipe, visit Jessica's blog, Domestic Deep Thoughts. If I were to make this again, I'd take a cue from Katrina of Baking and Boys! and make a chocolate cookie crust instead. She's a genius, that one.


Cinnamon Ice Cream

1 1/2 cups half-and-half
1 vanilla bean pod, split in two
1 cinnamon stick
1 cup white sugar
2 eggs, beaten
1 cup heavy cream
1 teaspoon vanilla extract
2 teaspoons ground cinnamon

Place the half-and-half, vanilla bean pod, and cinnamon stick in a medium saucepan over medium-high heat. Once the half-and-half comes to a simmer, take the pan off the heat, cover it with a lid, and let it infuse for at least 30 minutes and up to two hours.

When you're ready to proceed, return the pan to medium heat, remove the lid, and whisk in the sugar. When the mixture begins to simmer, remove from heat, and whisk half of the mixture into the eggs. Whisk quickly so that the eggs do not scramble.

Pour the egg mixture back into the saucepan, and cook until it reaches 175 degrees F on a candy thermometer, or until the mixture is thick enough to coat the back of a metal spoon.

Remove from the heat and pour it through a strainer into a large bowl. This will strain out the vanilla pod, cinnamon stick, and any bits of egg that might have cooked. Whisk in the heavy cream, then add the vanilla extract and cinnamon. Press a layer of cling wrap directly on top and cool in the refrigerator until completely cold.

Pour cooled mixture into an ice cream maker, and freeze according to the manufacturer's instructions.

Want to make chocolate bowls like in the photo? Chocolate bowls photo tutorial here.

Read More...

Tuesday, August 24, 2010

Summer Lovin' with Grilled Peaches

So, I didn't quite get around to making this week's Tuesdays with Dorie recipe, Crunchy & Custardy Peach Tart. It sounded lovely, and I even had the world's most beautiful farmer's market peaches on hand, luscious and just yielding to the touch and impossibly juicy.


But I had other plans in mind for these peaches. I wanted to take their sweet perfumed juice and introduce them to the tender buttery crumb of golden poundcake:


And then, in a perfect marriage of summer flavors and summer cooking, cook them both on the grill, until the peaches bore caramelized grill marks and gave no resistance to the fork, and the poundcake had a crunchy buttery crust that hid the still-soft interior.


Of course, they were not grilled naked. The poundcake was brushed with melted butter, and the peaches were dunked in a honey-butter sauce, with just a hint of cinnamon, before being put on the grill. While they were cooking, the sauce was returned to the heat to thicken for a few minutes, until it was the texture of a warm caramel sauce.

The peaches and poundcake were paired with a honey-vanilla ice cream and drizzled with the creamy honey-butter sauce. A glorious end to a casual dinner of grilled chicken and corn on the cob, and a perfect way to welcome in a balmy summer night.


Grilled Poundcake and Peaches
Serves 6

1-1/2 sticks unsalted butter, divided use
1/2 cup honey
1/2 teaspoon cinnamon
1/4 teaspoon freshly ground nutmeg
1/8 teaspoon salt
6 freestone peaches, halved and pitted
6 slices pound cake, sliced 3/4-inch thick
Ice cream of your choice

Melt the 1/2 stick of butter in the microwave and set aside for now.

In small saucepan over medium heat, combine the remaining 1 stick of butter, honey, cinnamon, nutmeg and salt. Heat until butter is melted, then dip peach halves in the mixture.

Grill the peaches for 5 minutes, then flip them, cover, and grill for 5 more minutes. Carefully remove them from the grill, slice each peach half in quarters and cover to keep warm.

While the peaches are on the grill, continue to heat the honey butter mixture until thick and caramelized, about ten minutes. It will get thicker once it cools down, so err on the side of caution. If you find it's too thick, add some cream or milk and heat it to loosen it back up.

Once the peaches are off the grill, brush both sides of each pound cake slice with the melted butter. Grill them for about 2 minutes per side, until the slices are crisp and golden.

Top the grilled poundcake with grilled peaches, cold ice cream, warm honey-butter sauce, and swoon.

Read More...

Monday, August 09, 2010

TWD: German Chocolate Ice Cream, Ya!

Attention all chocoholics, sweet lovers, and gluttons of good food, have I got a dessert for you!

The fabulous Katrina, of Baking and Boys! (gotta have that exclamation mark) chose Chocolate Ganache Ice Cream for this week's Tuesdays with Dorie recipe. If you're not familiar with Katrina, quit reading now--but please do come back--and check out her blog, because she is awesome. Funny, enthusiastic, with super cute sons and delicious recipes like raspberry chocolate chip cookies. Love her!

Another thing I love is this recipe for chocolate ice cream. I'd made it before, and despite the fact that it always causes my cheapie ice cream maker to go into convulsions (it hardens quickly and usually ends up having seizures before it's fully churned. Small price to pay for good ice cream) it's one of my favorites. Since I've already tried it plain, I decided to spice things up a little by making German Chocolate Ice Cream, with brownie chunks and swirls of rich coconut-pecan sauce.


However, the road to greatness is never smooth, and I learned several hard lessons during the course of making this dessert.

* Lesson 1: there is a difference between ½ cup of flour and 1-1/2 cups of flour. A big difference. Thrice the amount of recommended flour-style difference. When making the brownies, I accidentally triple the amount of flour the recipe called for. It was late, and I was tired from lugging boxes down to our storage space, and also, reading is hard. I didn't realize my mistake until I noticed that the batter was extremely sticky and actively fighting back at my attempts to stir it.

As the flour was the last ingredient, I decided to bake them off anyway and see if they would be usable in the ice cream. You might ask yourself what a brownie batch with three times the amount of flour looks like. Wonder no more:


Sexy, right? And by "sexy," I mean "nasty." BUT! It turns out I AM a culinary genius, because these brownies were perfect! I wanted something that had a cakey texture (hence the German Chocolate "Cake" part) but could keep its shape when mixed and scooped into ice cream.


These little nuggets were definitely on the cakey side, and they were sturdy without being too dense or hard. I wouldn't have served them plain, but for use in ice cream, they were totally fine.

* Lesson 2: it is impossible to make coconut-pecan sauce look appetizing. Even if you know what it is, and can imagine how delicious it tastes, it still looks like the vomit of Satan. Enjoy!


*Lesson 3: Ditto the above for German Chocolate Ice Cream. After the chocolate was churned, I stirred in the brownie bits, and then carefully swirled and layered the coconut-pecan sauce. It. Was. Amazing. But when it came time to photograph, the sauce blended into the ice cream and the whole thing looked like regular chocolate ice cream. You'll just have to imagine the hidden pockets of rich, brown-sugary sauce with chunks of toasted pecans and chewy coconut.


*Lesson 4: Despite all good intentions, it is impossible to resist eating several helpings of German Chocolate Ice Cream when you're photographing it. It starts innocently enough: a stray brownie bite here, a lick of the coconut-pecan spoon there, but soon you find yourself standing over the sink, tipping the bowl upside-down to lick out the last melty spoonfuls of ice cream. Or is that just me? Tell me it's not just me.


The ice cream recipe can be found over on Katrina's blog, and my recipe for coconut-pecan sauce (basically a looser version of the coconut-pecan frosting commonly found on German chocolate cakes) is below the cut. I'd give you the brownie recipe, but I don't quite trust myself to get the quantities right…just use your favorite cakey brownies, and don't forget to double-check the flour!


Coconut-Pecan Sauce for German Chocolate Ice Cream

1 stick (4 oz) butter, cubed
1 can evaporated milk
1 cup packed brown sugar
3 large egg yolks
1-2 tsp vanilla extract
heavy pinch salt
1 cup sweetened shredded coconut
1 cup toasted pecans, chopped

Combine the butter, evaporated milk, and sugar in a medium saucepan over medium heat. Heat the mixture almost to boiling, stirring often so it doesn't scorch. Meanwhile, whisk the yolks in a medium bowl.

Once it's simmering, temper the hot liquid into the yolks, then pour the whole thing back in the saucepan. Add the vanilla and the salt. Continue to cook, whisking often, until it thickens and coats the back of a spoon. Recipes always say to not let it boil, but I've been neglectful and boiled it before and nothing terrible happens.

Remove the custard from the heat and stir in the pecans and coconut. Cover with cling wrap and refrigerate until chilled. Makes a wicked awesome ice cream topping, oh yeah. [For cake frosting, take the evaporated milk down to one cup.]

Read More...

Wednesday, August 04, 2010

Passionate Baking, Three Ways

Even before I'd ever tasted passion fruit, I fell in love with the name. Growing up surrounded by boring, utilitarian fruit names (are you listening, orange?), learning that there was a fruit that broke this mold was a revelation. It belongs on a soap opera! Of course I was intensely curious about its flavor. Did it taste like joy? Lust? REVENGE?

By the time I finally tasted passion fruit, my expectations were high, but fortunately they were met with equal passion. This fruit, with its distinctive floral tropical taste and sweet-sour bite, is one of my favorite flavors. I'm sure it's much more common in other cultures, but in my experience it's still relatively rare, making passion fruit desserts that much more interesting to me.


My local grocery store carries lots of Mexican brands, and for years I've seen Goya passion fruit puree in the frozen food aisle. I've tried making smoothies with it, but--spoiler alert--it doesn't play well with protein powder. Recently I decided to give it the respect it deserves and create a dessert that showcases passion fruit's best qualities, so I came up with these passion fruit truffles for the candy site.

Passion fruit, at least in my experience, is pretty tart. If you're eating the whole fruit, you need to let it sit and really ripen for awhile, until it wrinkles and all those starches turn to sugar and its natural sweetness comes out. Frozen fruit puree doesn't have the benefit of sitting for a week on the kitchen counter, so it needs some outside assistance to mellow the harsh edges of the passion fruit.

I used the puree to make a white chocolate ganache. The remarkable thing about this ganache is that almost all of the liquid is fruit juice--only a little bit is cream. Of course there's plenty of fat from the white chocolate, but the high juice ratio still makes it float a little bit lighter on the tongue, and glide down the throat a little easier than some heavier ganaches.

When you're making these truffles, you'll want to use good chocolate, the kind you buy in bars and chop up, the kind that you want to snack on while you're chopping. White chocolate chips have other additives that make them resistant to melting, and they don't taste like much of anything, so avoid them if you can.


The resulting passion fruit ganache is rich and creamy, with a light fruity taste that whispers of warm afternoons and island vacations, but with a white chocolate finish that brings your feet back down to the ground. The ganache sets somewhat loose, so you'll want to mold these truffles, instead of hand rolling them. Dusted with a sprinkling of gold luster dust, they look--and taste--like a million bucks. The full passion fruit truffle recipe is here.

But this passion fruit party is only starting. Because the other thing I didn't tell you about the ganache is that it makes a lot. A LOT. A-maybe-we-should-invite-the-neighbors-over-to-help-eat-all-these-truffles-lot. So if you're like me, and the thought of molding five dozen truffles doesn't appeal to you, you'll try to find other ways to use your extra ganache.

Solution #1: Chocolate Passion Fruit Tarts

The ganache was poured into miniature chocolate tart shells and topped with bittersweet chocolate shavings. That is the full extent of this recipe. Ganache. Tart shell. Bliss.
The shell is barely sweetened, and the crunch of the savory cocoa shell contrasting with the sweet-tart creamy ganache is heavenly. This is one of those showstopping desserts you want to keep up your sleeve to impress company, so after you receive all of their compliments, you can say--with the blush of honesty but with a twinkle in your eye--"It really was nothing."

My second attempt at reworking the passion fruit ganache was a little more elaborate but equally delicious:

Passion Fruit-White Chocolate Ice Cream


I incorporated some of the ganache into a custard ice cream base and churned it to produce an ice cream that had the signature passion fruit taste, tempered by the addition of more milk, more cream, and more sugar. This is a perfect introduction to the fruit for skeptics, and it paired beautifully with small cookies made from tart dough scraps.

Looks like my passion for passion fruit yielded the world's longest blog post. If you're still with me, and looking for recipes, they're right below the cut...


Passion Fruit Ganache


2 tbsp heavy cream
2 tsp light corn syrup
2/3 cup passion fruit juice or puree
9 oz good-quality white chocolate (not chips)

If you are using passion fruit puree, pass it through a mesh strainer to remove the solids from the juice, and discard the solids. Place the 2/3 cup of juice in a small saucepan with the light corn syrup and the heavy cream over medium-high heat. Bring this mixture to a boil.

Finely chop the white chocolate and put it in a heat-safe bowl. Once at a boil, pour the hot liquid over the white chocolate and immediately begin gently whisking to melt the white chocolate and emulsify the mixture. If you have a handheld immersion blender, use it to blend the passion fruit ganache together. Otherwise, just continue whisking until you have a silky smooth mixture with no bits of white chocolate remaining.

Press some cling wrap over the top of the ganache and refrigerate the bowl until the ganache has cooled, about 2 hours. Alternately, you can refrigerate it over night, and then take the bowl out of the refrigerator the following day and let it sit at room temperature until it loosens up.


Dark Chocolate Tart Dough
Adapted from Dorie's chocolate tart dough
1 1/4 Cups Plain flour
1/4 Cup Unsweetened cocoa powder
1/4 Cup powdered sugar
1/4 Tsp Sea salt
135g Very cold unsalted butter, cut into small pieces
1 Large Egg yolk

Put the flour, cocoa powder, sugar and salt in a food processor and pulse a few times to combine.
Scatter the pieces of butter over the dry mixture and pulse until you have butter pieces the size of oatmeal.
Stir the yolk with a fork and add it a little at a time, pulsing after each addition.
Process in long pulses (10 seconds each) until the dough comes together in clumps and curds.
Turn the dough to a lightly floured surface a knead briefly in order to incorporate the dry ingredients that might have escaped the mixing.
Press into tart shells and freeze before baking at 350 for 10-12 minutes.


Passion Fruit Ice Cream

About 1.5 cups passion fruit ganache, loose and at room temperature
3/4 cup heavy cream
1 cup of whole milk
4 large egg yolks
1/2 cup of sugar

Bring the milk and the cream to a boil in a medium heavy bottomed saucepan.

Meanwhile, in a medium bowl, whisk the yolks and sugar together until well blended and just slightly thickened. Still whisking, drizzle in about one third of the hot liquid-this will temper, or warm, the yolks so they won't curdle.

Whisking all the while, slowly pour in the remaining liquid. Pour the custard back into the pan and cook over medium heat, stirring without stopping, until the custard thickens slightly and coats the back of a spoon. I always use a thermometer and shoot for 175 degrees F.

Immediately remove the pan from the heat and slowly and gently stir the custard into the ganache. Cover the ice cream base with cling wrap and refrigerate until completely cool. Churn in your ice cream maker according to the manufacturer's directions.

Read More...

Monday, July 19, 2010

Putting the "Feh" in Fennel Ice Cream

So because of moving shenanigans and general mayhem, I didn't make this week's TWD recipe. However, I DO have a recent (non)baking (non)adventure to share with you!

If you have ever heard the worlds "Fennel Ice Cream" and thought to yourself, "Blerg! Never the twain shall meet!" you would be so, so right. However, I am not endowed with your brains, and I got tricked into thinking I would enjoy it. Fennel. And ice cream. Cohabitating in one dish. Think about that.


It all started when I read a post on Orangette praising fennel ice cream. Now, you should know that I'm not too much of a bandwagon-jumper. To wit:

  • I didn't see an episode of Seinfeld until the show ended and it was well into syndication
  • My first (and only) ipod was a gift from someone else
  • I still haven't read any of the Twilight books or seen the movies

However, this Orangette posting was persuasive on the charms of fennel ice cream. The word "bewitching" was used. The words "best ice cream" were used. I learned that Smitten Kitchen had also raved about this ice cream, and it had unanimous, four-fork, 100% rave ratings on epicurious. I tried to resist, but I am only one woman, and I can only be so strong.

Fennel ice cream. I was sold...

...until I tasted it. The only way to describe it would be "quite fennelly." It was woodsy and savory, but not in a good way. Maybe I had the world's strongest fennel seeds, maybe my palate is too pedestrian, but I found myself wanting to stuff this ice cream in a sausage and serve it with some marinara. Fennel indeed.

In all fairness, it was better with some basil-balsamic strawberries, and the husband actually liked it more than I did. But still. It's a long hot summer, there are plenty of other ice cream fish in the sea.

Read More...

Wednesday, June 16, 2010

Perfect Mint Chip Ice Cream

So I know I always claim to not appreciate ice cream much, but all of those weak protestations went out the window last weekend when I was confronted with this:

Homemade Mint Chip Ice Cream. Oh yes.

And this wasn't mint from a bottle, mind you, this was huge handfuls of fresh mint, infused into the milk and cream mixture for a full hour.
I swear, my kitchen smelled like a spring garden when this was done infusing. The taste of fresh mint is so unlike mint extract, I wonder how I was conned into using the bottled stuff for so long.

So after the custard was made, chilled, and churned in the ice cream maker, the fun REALLY began. One of my favorite things about this recipe was the fun, creative method of forming the chocolate "chips." In past mint chip attempts, I've simply used chopped chocolate, which always leaves me gnawing on ice-cold chocolate boulders and praying for the integrity of my molars. This recipe was entirely different.

Step 1: melt chocolate and place it into a Ziploc with a tiny hole cut in the corner. Squiggle some melted chocolate into the ice cream storage container.
Smooth a thin layer of mint ice cream on top of the melted chocolate.

Drizzle more melted chocolate on top of the ice cream. Don't be stingy, you want to use up all the chocolate!

The chocolate will start to freeze and harden right away, so immediately take a spoon and stir around the top, breaking up the strands and forming little chocolate shards that get embedded into the ice cream.

Lather, rinse, repeat several times, until you've used up all of the ice cream and all of the melted chocolate. Aside from being really fun to do, this method produces perfect little strands of chocolate throughout the ice cream that are never too chunky or hard.

After another quick chill in the freezer, this ice cream was perfect. Rich, smooth, full-flavored, redolent of cooling mint, and the earth, and rich bittersweet chocolate.


I wish this was my recipe, believe me. But I actually got it from David Lebovitz, whose recipes have yet to let me down. You can find it on his blog. Bon appetit, my overheated, ice cream loving friends!

Read More...

Tuesday, May 25, 2010

TWD: Banana-Coconut Ice Cream Pie

This week's Banana-Coconut Ice Cream Pie was a bit of an odd duck for me. I think a large part of my problem was the name. It had me expecting lush tropical flavors, but then the chocolate ice cream kind of stole the show and overwhelmed everything else. (Not that there's anything wrong with that...) Since I always judge a book by its cover (and usually the summary inside the flap) I didn't really know what to make of my tropical-sounding, conventional-tasting mini tarts. Which is not to say that were bad, just that I am sometimes a very literal person.
The recipe, as written, called for a coconut-shortbread crust, filled with sliced bananas and chocolate ice cream that was mixed with pureed banana. The tart was to be finished with more sliced banana. If you're keeping score at home, that's a whole lot of banana in one little dessert. (And also not nearly enough coconut, but that's only because I'm addicted to the white stuff.)

I halved the recipe and made two mini tarts, since I'm the only one home for two weeks, and even my level of gluttony couldn't handle a whole ice cream pie. Some folks complained that the banana flavor was too much, so I tried two different versions. One, above, had sliced bananas above and below the ice cream, as written. The second, below, just had bananas in the ice cream, and was topped with whipped cream and chocolate shavings.

For my taste, the bananas in the ice cream were enough. The flavor still shone through, but I wasn't eating mouthfuls of freezer banana with every bite. Plus, this gave the coconut more of a chance to shine.

I made the chocolate ice cream using Dorie's recipe for Chocolate-Blueberry Ice Cream (omitting the blueberry preserves.) People, it is AWESOME. Mine turned out pretty hard, but there's also a chance I added too much chocolate, since I kept nibbling it after I'd weighed it out and then had to throw a handful into the bowl to make up for it and might have added too much, and surely I can't be the only one who can't be trusted around a bowl of chopped chocolate while baking? Bueller?

Aaaanyhow, these tarts were great, and a nice, relatively easy summery dessert. I'd do them again without bananas and with the whipped cream in a heartbeat. To get the recipe, head on over to Spike's great blog.


Read More...

Monday, May 17, 2010

Apple-Apple Bread Pudding (MY PICK!)

Today is a banner day, my friends! Today is the day that we baked my chosen recipe for Tuesdays with Dorie, the online baking group I belong to. If you're not a member of this group, please understand that this is a Big Deal. There are approximately five bajillion members (give or take a kablillion) so most weeks, we TWD'ers end up making a recipe someone else has picked out. After a year and a half in the group, it was finally my turn, so you'd think I would be excited, right?

Well, I was excited. But I also felt pressure! And fear! And the ice-cold sweat of the guilty upon my brow! You see, everyone wants to pick a recipe the group will love. No one wants to be the one to inflict the TWD equivalent of the infamous Sandra Lee Kwanzaa cake upon their friends. Adding to this concern is my certainty that I have bad TWD karma because I complain about the recipes all the time. It's nothing against Dorie--I truly love this book--it's more about being an obnoxious nitpicky perfectionist who always wants to tweak things and make them just a bit better.

So although I was looking forward to choosing a recipe, I'm also sure that I've cosmically earned whatever apathy or negativity anyone has toward this week's recipe. And what a struggle it was to decide! I've confessed before that I am a bread pudding-holic. It's been a year since my admission, and I still haven't hit rock bottom. So obviously I'd had my eye on her Apple-Apple Bread Pudding since day one. But I had so many doubts: bread pudding isn't a springy dessert! And why use apples when there are so many delicious berries coming into season? And what about all the bread pudding haters? So I struggled. But in the end, I had to be true to myself, and my stomach, and say, as did the wise Kenneth from 30 Rock, "This mess is going to get raw like sushi, so haters to the left!"

This bread pudding was different from any others that I've made. It actually seemed almost more like stuffed French toast. Toasted brioche is slathered with apple butter, then caramelized apples are sandwiched in between the slices, and the custard is poured over the whole thing. As you can see from the picture above, the end result is just about the most delicious--and calorically deadly--sandwich you could have.
I decided I couldn't have my bread pudding going out into the world naked, so I made cinnamon ice cream to go with it. (That linked recipe is just about my favorite ice cream recipe ever. And I swear, the "Elizabeth" who submitted it is not me. I would take full credit if it was!) I reserved some of the ice cream mixture before churning, so some of the bread pudding was served with cinnamon creme anglaise instead. Either way, you can't go wrong!

Here's the truth: I didn't love this right away. Of course I'm an impatient monkey and was there with my tastin' spoon the second I took the bread pudding out of the oven. I risked a burnt mouth to shovel it on in, and...I was disappointed. I don't know if I overcooked it, or what, but it was eggy and not so flavorful. Believe me, I was crushed.

But, not being willing to admit defeat, I kept tasting it in 15-minute intervals. (Ah, dinner, I hardly knew ye.) As it cooled and settled, it got better and better. Turns out patience really is a virtue! By that evening, I liked it quite a bit, especially when served warm with the cinnamon ice cream melting on top.

But the truly happy ending to this story is that I loved it the next day! I don't know what magic my refrigerator worked overnight, but when it was reheated the next day, it was amazing. Moist, flavorful, melting into the ice cream...to die for. I'm looking forward to trying this recipe again this summer with more seasonal fruits, like using fresh peaches and peach jam, maybe with ginger ice cream? Yum!

Thanks to everyone who baked along with me this week! Here are the blogs of my fellow TWD'ers who made it, and here's the recipe:

Apple-Apple Bread Pudding
From Baking: From My Home to Yours by Dorie Greenspan

For the caramelized apples: [I actually made this times 1.5]
3 medium apples, peeled and cored (Fuji or Gala recommended)
3 tbsp unsalted butter
3 tbsp sugar

12 oz egg bread, such as challah or brioche, sliced 1/2" thick and stale

1 cup store-bought spiced apple butter [I used more like 2 cups]

3 cups whole milk
1 cup heavy cream
3 large eggs
5 large egg yolks
3/4 cup sugar
1 tsp vanilla extract

Confectioner's sugar or apple jelly, for finishing

Getting Ready: Butter a 9x13-inch baking pan (like Pyrex), dust the inside with sugar and tap out the excess. Line a larger roasting pan with a double thickness of paper towels.

To Caramelize the Apples: Cut each apple into smal lchunks. Put a large nonstick skillet over medium-high heat, add the butter, and, when it melts, sprinkle over the sugar. Cook the butter and sugar for a minute or so--you want the sugar to caramelize but not burn, so adjust the heat accordingly. Toss in the apple slices--don't worry if the caramel seizes and lumps, it will melt and smooth out as you work--and cook, carefully turning the apples once or twice, until they are tender but not soft, 3-5 minutes. They should be golden, and some might even be caramelized. Remove from the heat.

To Make the Bread Pudding: If your bread is not stale, spread it out on a baking sheet and bake at 350 F for 10 minutes to "stale" it.

Spread one side of each slice of bread with the apple butter, then cut each slice on the diagonal to get 4 triangles. cover the bottom of the baking pan with half of the bread, arranging the triangles, buttered side up, so that they overlap slightly (don't worry about spaces between the slices.) Spoon over the apples and their liquid and finish "the sandwich" with the rest of the bread.

Bring the milk and cream just to a boil.

Fill a teakettle with water and put it on to boil; when the water boils, turn off the heat. Meanwhile, in a medium bowl, whisk together the eggs, yolks, and the 3/4 cup sugar. Still whisking, slowly drizzle in about one quarter of the hot milk mixture--this will temper, or warm, the eggs so they won't curdle. Whisking all the while, slowly pour in the remaining milk. Add the vanilla and whisk to blend. Rap the bowl against the counter to pop any bubbles that might have formed, then spoon off any foam that has risen to the top. Pour the custard over the bread and press the bread gently with the back of a spoon to help it absorb the liquid. Leave the pan on the counter, giving the bread the back-of-the-spoon treatment now and then, for about 30 minutes.

Getting Ready to Bake: Center a rack in the oven and preheat the oven to 325 degrees F.

Put the baking pan in the roasting pan, slide the setup into the oven and very carefully pour enough hot water into the roasting pan to come halfway up the sides of the pudding pan. Bake the pudding for about 1 hour and 25 minutes, or until a thin knife inserted deep into the center comes out clean. Transfer the baking pan to a rack and cool for at least 20 minutes before serving.

The pudding can be served as is or dusted with confectioners' sugar just before serving. Or, if you want to give the pudding a little gloss, put about 1/2 cup apple jelly in a small pot with a splash of water. Heat until the jelly liquefiees, then brush a thin layer over the top of the pudding. Or...my personal recommendation...serve with lots of ice cream!

Read More...

Monday, May 03, 2010

TWD: Burnt Sugar Ice Cream

I have just 3 letters to describe this week's TWD pick, Burnt Sugar Ice Cream.

O.M.G.

Now obviously, this stands for
Oh-so-delicious
Mind-blowingly
Good
Or, judging by the tasty puddle rapidly forming underneath all my ice cream scoops, despite hours of chilling and lightening-quick scooping, it stands for
Outrageously
Melty &
Guzzle-able

Yes, we absolutely loved this ice cream. I am usually lukewarm about ice cream (pun?) but even I couldn't stop eating this...and then licking the bowl...and finally the lid of the ice cream container. The deeply caramelized flavor was fabulous, but more than that, I loved the soft texture that stayed smooth for days, unlike most other homemade ice cream recipes that get rock-hard. In honor of its awesomeness, I made some sugar decorations to gussy up the plain bowls.

[And hey! Remember when I made sugar corkscrews? Well, I recently made a short video showing how it's done. In just two and a half minutes you can learn how too, if you're so inclined. The video is here. And now back to your regularly scheduled programming...]

The husband has had at least one helping a day, under the guise of market research. (So far we have discovered that it's equally good on its own, with warm cookies, and as part of an ice cream float. However, I fear more research is needed.) This will definitely be a recipe we'll come back to again and again. You could say we're
Obsessed,
Majorly Smitten, &
Ga-ga
over it.

Want to make this ice cream? Of course you do! Becky has the recipe over on her blog.

Read More...

Tuesday, April 06, 2010

The Ballad of A Bad Bundt Pan

This week's TWD recipe was Marbled Mocha-Walnut Bundt Cake. Another bundt cake? You know what this means:

Liz vs. Her Bundt Pan: Ultimate Death Match VI: Bake-Off Boogaloo

Remember last week when I made that Coconut Tea Cake in the bundt pan, and I whined about how my "nonstick" bundt pan was no such thing? Well, dear Leslie suggested that I coat it with shortening, then nonstick cooking spray, then flour. Aha, I thought to myself, not one, not two, but THREE elements that prohibit stickiness! This plan cannot fail!

Any guesses as to what happened next?

Bundt pan: 6 (or 7, I've lost count by now) Liz: 0

Look at it there, smirking at me with its stupid smirky bundt face.

Now, I'm no bundt technician. I didn't major in Bundt Studies in college (choosing instead the only slightly more helpful American Studies, ah, the liberal arts! Producing bitter temp workers by the thousands) but I am sort of a ninja when it comes to covering up my kitchen mistakes. So I got crafty with a soft plastic knife, and ever so delicately massaged the remaining cake back together in an approximation of its original shape.


I had originally made a chocolate sauce to serve alongside the cake, but once I saw the sorry state of this bundt, I knew there needed to be a more drastic cover-up. Fortunately, the sauce I made was Sherry Yard's 10-Year Chocolate Sauce*, which actually works moderately well as a poured icing, so I heated it until it was very liquid and poured it over the cake. Success! No one would ever know what horrors lurk beneath.

*Please make this sauce. It is outrageous. A wonderful texture, and a great tangy taste (I used sour cream in place of creme fraiche.) It was a bit thick to pour, but if the cream was increased by a few tbsps it'd be perfect. Or you could omit the cream to thicken it and have an awesome spreadable frosting. Love.

A word of strategy if you're ever in the same situation: put the cake on a cardboard round! It was way too unstable to handle the glazing and transferring to a serving platter, so I scooted a round underneath it and trimmed it at an angle so the cake hung slightly over the edge. You can't even tell from the pictures. See, what'd I tell you? Ninja.


To complete the deception, I piled the bundt high with fresh farmer's market strawberries and candied walnuts. I actually put a shot glass in the center of the cake and then just put berries on top for the photo, so there weren't strawberries piled all the way down into the center. It's an illusion. Also, I'm not sure why I'm suddenly compelled to unburden all of my deep dark baking and photographing secrets. Maybe I shouldn't have had that Truthiness Tonic at lunch.


I didn't make the mocha version, mine was just a chocolate-vanilla cake. And I got a little crazy adding the chocolate, so the marbling suffered a little bit. Next time I'll keep more batter plain, and exercise more restraint with the swirlin' knife. We had this cake for Easter dessert, along with the rest of the chocolate sauce, fresh strawberries, the candied nuts, and my very favorite homemade vanilla-honey ice cream (recipe under the cut).


We both loved this cake, but I think it really helped that it was covered with chocolate frosting and sauce, and served with so many extras. On its own it seemed a little plain and unexciting, but it got by with a little help from its friends.

Now if you'll excuse me, I have a bundt pan I need to go karate chop.


Vanilla-Honey Ice Cream

1 cup white sugar
1/3 cup honey
2-1/4 cups half-and-half cream
3 eggs, beaten
1-1/2 cup heavy cream
1 TBSP teaspoon vanilla extract

Break the eggs into a medium-sized bowl and lightly whisk them.

In a saucepan over medium-low heat, stir together the sugar and half-and-half. When the mixture begins to simmer, remove from heat, and whisk half of the mixture into the eggs. Whisk quickly so that the eggs do not scramble. Pour the egg mixture back into the saucepan, and stir in the heavy cream.

Continue cooking over medium-low heat, stirring constantly, until the mixture is thick enough to coat the back of a metal spoon. (I always use a thermometer--175 degrees F is the magic number.) Remove from heat, and whisk in vanilla. Pour into a bowl, cover the top with cling-wrap, and refrigerate until completely cool.

Pour cooled mixture into an ice cream maker, and freeze according to the manufacturer's instructions.

Notes: You can omit the honey and use 1.5 cups of granulated sugar. For a stronger vanilla flavor, use 1 vanilla pod, scraped, and reduce the vanilla extract.
Also, this makes a DELICIOUS cinnamon ice cream! Simmer the half and half with 1-2 cinnamon sticks, and/or add ground cinnamon at the end with the vanilla. So. Good.

Read More...