This week's TWD recipe, for a Coffee Ice Cream Tart, can be divided into two categories: things I did differently, and things I wish I'd done differently.
In the "Things I Did Differently" camp, we have the ice cream itself. Instead of doctoring up store-bought coffee ice cream with ground almonds (??) I made my very favorite recipe for cinnamon ice cream (found below). The ice cream is delicious. I have no regrets. You can keep your ground almonds!
In the "Things I Wish I'd Done Differently" category, we have...the rest of the tart. Sorry to say, the ice cream was totally the best part of this for me. The crust was way too hard, the almond flavor was too strong, and the layer of melted chocolate between the crust and the ice cream nearly shattered a molar. I was left gnawing on my crust like a crazed rodent. Not a good look. 
On the bright side, I got to play around with piping some ganache on top, and I also had some candied flowers lying around (yes, I know my life is ridiculous) so I primped the tart for a little photo shoot. "You look maaaahvelous, dahling!" (Candied Flowers photo tutorial here.)
So, I'm not in love, but I can't be mad because any recipe that gives me an excuse to make cinnamon ice cream--and then lick said ice cream from inedible tart crust--is okay in my book. 
For the original recipe, visit Jessica's blog, Domestic Deep Thoughts. If I were to make this again, I'd take a cue from Katrina of Baking and Boys! and make a chocolate cookie crust instead. She's a genius, that one.
Cinnamon Ice Cream
1 1/2 cups half-and-half
1 vanilla bean pod, split in two
1 cinnamon stick
1 cup white sugar
2 eggs, beaten
1 cup heavy cream
1 teaspoon vanilla extract
2 teaspoons ground cinnamon
Place the half-and-half, vanilla bean pod, and cinnamon stick in a medium saucepan over medium-high heat. Once the half-and-half comes to a simmer, take the pan off the heat, cover it with a lid, and let it infuse for at least 30 minutes and up to two hours.
When you're ready to proceed, return the pan to medium heat, remove the lid, and whisk in the sugar. When the mixture begins to simmer, remove from heat, and whisk half of the mixture into the eggs. Whisk quickly so that the eggs do not scramble.
Pour the egg mixture back into the saucepan, and cook until it reaches 175 degrees F on a candy thermometer, or until the mixture is thick enough to coat the back of a metal spoon.
Remove from the heat and pour it through a strainer into a large bowl. This will strain out the vanilla pod, cinnamon stick, and any bits of egg that might have cooked. Whisk in the heavy cream, then add the vanilla extract and cinnamon. Press a layer of cling wrap directly on top and cool in the refrigerator until completely cold.
Pour cooled mixture into an ice cream maker, and freeze according to the manufacturer's instructions.
Want to make chocolate bowls like in the photo? Chocolate bowls photo tutorial here.
Tuesday, April 05, 2011
TWD: Cinnamon Ice Cream Tart
Thursday, March 17, 2011
Marzipan Brownie Tart
Happy St. Patrick's Day! To celebrate, we had this festive dessert:
Okay, so it doesn't look very festive from the outside. Actually, it looks downright plain. Homely. FRUMPY. There, I said it. But it has a surprise inside...

To finish off our green treat, I made my favorite pistachio ice cream and a simple chocolate sauce. Although the tart is moist, it needs something--ice cream, or whipped cream, or maybe creme anglaise--to perk it up. Many, many thanks to Mary Mary Culinary for the tart recipe & inspiration! Find the recipe for the tart, the "pistachio stuff," and the ice cream after the jump.

Marzipan Brownie Tart
Adapted from Mary Mary Culinary
9 oz/1⅓ cups all-purpose flour*
⅓ cup Dutch-process cocoa
½ teaspoon baking powder
¼ teaspoon salt
7 oz/1 cup brown sugar
6 oz/¾ cup unsalted butter, chilled and cubed
1 egg, well beaten
Filling
10½ oz pistachio marzipan (see below)
about ½-¾ of a beaten egg (reserve the rest for glazing)
1. Combine flour, cocoa, baking powder, salt and sugar in a food processor and pulse to combine. Add the butter and pulse until it resembles breadcrumbs. Add the beaten egg and run the food processor until the dough comes together. Try not to eat all the dough. Divide the dough into ⅓ and ⅔ portions, shape in discs, wrap separately in plastic and refrigerate. Chill for one hour. It can be made the day before, but will need to warm up before rolling to prevent it from breaking up.
2. Preheat oven to 340℉/170℃ and grease a 9" cake pan, or a 13"x4" tart pan.
3. Mix the pistachio paste with enough beaten egg to make a fairly soft, spreadable filling. Set aside. Roll out the larger portion of dough between 2 pieces of plastic wrap until it is about 1" larger than your pan on all sides. Make sure there are no creases in the plastic wrap. Use this piece of dough to line the pan, pressing it to the sides of the pan so it doesn't fall inward. Spread the pistachio paste evenly over the dough and fold in the dough edges so they rest on it. Reuse the plastic wrap to roll the smaller piece of dough into an 8½" circle. It should be slightly smaller than the cake pan. Trim it so the edges are neat. Moisten the edges of the dough in the pan and lay the smaller circle on top. Press the edges gently together to seal. Brush with the leftover beaten egg and prick with a fork in several places.
4. Bake for 30-35 minutes. Leave to cool in the pan, then transfer carefully to a serving plate. If you can stand it, wrap this and let it sit for a day or two before serving for best flavor.
*a note about the flour: something is off in these measurements. It calls for 1-1/3 cup/ 9 oz, but 9 oz is much closer to 2 cups. I went with the volume measurement and had a dough that was pretty stick and a bit of a beast to roll out. It worked out fine in the end, and tasted great, but I might add more flour next time to make it easier to work with. If you have a scale, I'd just use 9 oz, and if you don't, I'd try 1-3/4 cup flour instead.
Pistachio marzipan
10 ounces/283 grams shelled pistachios
7 ounces/200 grams granulated sugar
2 egg whites
1. If you want naturally bright green marzipan, first blanch the pistachios: bring a large pot of water to a boil, add pistachios and blanch for 30 seconds to one minute. Test one by running it under cold water and seeing if the reddish skin comes off easily. If so, drain and rinse with cold water. Now, one by one, squeeze the pistachios to remove the skin. This is what keeps the marzipan bright green. Once they are all skinned, place on a towel-lined baking tray and allow to dry for at least 3 hours. Do not dry in the oven, as the color may fade.
2. Combine pistachios and sugar in a food processor and grind as finely as desired.
3. Add egg whites and process until well blended. If you didn't blanch the pistachios and the marzipan is a little brown, you can add a drop or two of green food coloring. Scrape into a container and refrigerate or freeze. This keeps well, and is best made in advance.
Pistachio Ice Cream
yield: About 3 cups
1 cup unsalted shelled pistachios
3/4 cup sugar
2 cups milk (do not use low-fat or nonfat)
1/2 teaspoon almond extract
4 large egg yolks
1 cup whipping cream
3/4 cup unsalted shelled pistachios, toasted, coarsely chopped
Finely grind 1 cup pistachios and 1/4 cup sugar in processor. Bring milk and ground pistachio mixture to boil in heavy large saucepan. Remove from heat. Mix in almond extract.
Whisk egg yolks and remaining 1/2 cup sugar in medium bowl. Gradually whisk in hot milk mixture. Return custard to saucepan. Cook over low heat until custard thickens and leaves path on back of spoon when finger is drawn across, stirring constantly, about 10 minutes (do not boil). Strain into large bowl. Chill until cold, about 2 hours.
Stir 1 cup whipping cream and chopped pistachios into custard. Process mixture in ice cream maker according to manufacturer's instructions.
Monday, November 15, 2010
TWD: Cranberry-Lime Galette
For many of us, the capital-H Holidays are approaching, and I don't know about you, but I feel like I've already been run over by a festive seasonal truck and it's barely mid-November. The last few months I've felt like Wile E. Coyote frantically churning my legs in midair, trying to run across the sky without looking down. All of which is to say, I'm sorry I haven't been reading and commenting much on blogs. Or blogging here, for that matter. Or showering as often as I should. (I guess that last one mostly applies to the husband. Love youuuuu.)
The hectic pace recently has made me grateful for simplicity wherever I can find it, like in this week's Cranberry-Lime Galette:
Galettes, or as I like to call them, "pies for lazy people," are a genius invention. Pie dough is piled high with filling, then the edges are folded over and the whole thing is baked on a cookie sheet. No tearing of misshapen top crusts, no crimping of edges, and no trying to wiggle perfect slices out of a reluctant pie tin. It's just fill, fold, bake, and devour. Near-instant gratification.
The filling in this case was a seasonal blend of fresh cranberries, dried cranberries, and apples, plus a surprise sneak attack from lime zest, lime juice, and fresh ginger. I cut down the amount of fresh ginger and it still shone through beautifully. This galette contained a lot of strong flavors, but they all worked surprisingly well together.
I continued my love affair with spiced whipped cream and made another batch flavored with vanilla and cinnamon to top this galette. I think cream--or possibly ice cream--is definitely necessary to mellow the tart flavors and balance everything out. So you have my permission--nay, my orders--to eat this with gobs of whipped cream. It's necessary! And oh so delicious.
You guys, I don't want to freak you out, but Thanksgiving is next week. When did this happen, and what are we going to do about it?? Have you all started planning your menus? Forget all the turkey junk, what are you making for dessert? I'm thinking the Cranberry Shortbread Cake is going to have to make another appearance.
Tuesday, November 09, 2010
TWD: Cranberry Shortbread Cake
Yesterday afternoon, as I was spoiling my husband's dinner by force-feeding him cranberry cake and whipped cream, he looked me in the eyes and said, with great feeling, "Miy WOUFF Troiusdapes miff Rorfty!"
Fortunately, we have been married long enough that I'm able to translate Full Mouth into English, and knew that he was saying that he loved Tuesdays with Dorie. I have to agree! I have so many wonderful cookbooks that I only consult when I'm baking for a special occasion. I'm sure Baking: From My Home to Yours would be one of those without a weekly obligation to make and blog about a recipe. I'm not sure I ever would have made this Cranberry Shortbread Cake without the prodding of a baking group, but I'm so glad I did.
First, we must discuss this dessert's identity crisis. Shortbread...cake...? Que? To me it tasted most like a double-crusted tart, which is definitely not a bad thing. The crust was similar to a sugar cookie dough, with a great mix of a crackling sugary crust and a tender crumb inside. 
Inside is a simple cranberry-orange jam, with enough sugar to round out the tart edges but enough bite to balance the sweet dough. I chickened out a little with the filling, and didn't use all of it because it seemed like it might overwhelm the thin crust. In retrospect I could have used the full amount, but it didn't seem to be lacking for flavor, either.
The real kicker, for me, was the softly whipped cream on top. I added lots of vanilla and a little cinnamon and freshly grated nutmeg to the cream, and the combination of spices, aromatic vanilla, and sweet cream on the tart cranberry cake was fantastic. I'm not usually much of a whipped cream fan, but I wanted to put this in a Big Gulp cup and drink it with a straw.
Not that that actually happened.
Ahem.
The final touch was a few of these glazed cranberries. The recipe couldn't be easier--fresh cranberries dunked in whisked egg whites, then rolled in granulated sugar. After an hour or two the sugar crust gets hard, so they almost explode in your mouth when you bite into them. The berries are juicy and fairly sour, but the sugar keeps them from being too lip-puckering. These were the perfect finishing touch to an already perfect dessert. I'm looking forward to experimenting with this recipe and using sauteed apples for the filling, and maybe a strawberry/rhubarb combination come spring.
Sunday, October 03, 2010
Tarts Worth Writing About
I've had a few summer posts lurking around waiting to be completed, and now that it's October the time for fresh berry desserts has almost passed! Quickly, quickly now...
It all started with a new kitchen in a new apartment in a new city. Or rather...
A sweet pistachio tart crust in a new kitchen in a new apartment in a new city.
A light and luscious lemon cream in a sweet pistachio tart crust in a new kitchen in a new apartment in a new city.
Soft, ripe berries on a light and luscious lemon cream in a sweet pistachio tart crust in a new kitchen in a new apartment in a new city.
And best of all, some good friends to help us eat the soft, ripe berries on a light and luscious lemon cream in a sweet pistachio tart crust in a new kitchen in a new apartment in a new city!
When we had our housewarming party a month (...or two...) ago I made these cute mini tarts to celebrate. At the time, they fit the season perfectly: light, fresh, vibrant as the summer sunshine. Now it's a bit harder to find good berries at the market, but the tart dough and cream can still be made, and they could be topped with candied citrus peel, pomegranate seeds, or caramelized nuts.
Honestly, making these in mini muffin tins is a pain. The dough goes from rock-hard to super-soft in a matter of minutes, so it's a constant race between the table, the fridge, and the freezer. They have to be gently rolled and cut and pressed and trimmed and chilled and baked and then ever so gently coaxed out of the tins without shattering--my personal obstacle--and if you're like me and you only have two tins, you're ensnared in this process all morning and wondering what the heck is wrong with a full-sized tart anyways?
But really, I didn't mind. No, really. Because these tarts were about more than taking a good picture or having a cute centerpiece. The time I spent making these, rolling and scraping and pressing and nibbling on dough, in my pjs with flour in my hair, I had a heart full of gratitude. For our new apartment, for our old friends, for the luxury of time to make the tarts--to spend hours on stupid miniature crusts!--and for the money to buy fresh berries. I kept thinking how lucky I was, in this life.
It was all connected. And it turned what could have been a chore--what, too often, IS a chore in my overscheduled head--into an exercise in seeing the beauty and blessings in the world. And that is why these tarts are worth writing about, no matter what season it is.
Sweet Pistachio Tart Dough
1 3/4 cups all-purpose flour
1/2 cup ground pistachios (I like roasted & salted)
3/4 cup confectioners' sugar
1/2 teaspoon salt
6.75 oz very cold butter, cubed
1 large egg yolk
Put the flour, ground nuts, confectioners' sugar and salt in the bowl of a food processor and pulse a couple of times to combine. Add the butter and pulse until the butter is cut in coarsely. Add the egg yolk and process in long pulses - about 10 seconds each - until the dough just starts forming clumps. Just before your reaches this clumpy stage, the sound of the machine working the dough will change. Wrap the dough in cling wrap and refrigerate until firm, about 2 hours.
Luscious Lemon Cream
Adapted from Dorie Greenspan's "Most Extraordinary Lemon Cream Tart"
1 cup sugar
zest of 3 lemons
4 large eggs
3/4 cup fresh lemon juice
2 sticks (8 oz) unsalted butter, at room temperature
Put the sugar and zest in a double boiler or a heatproof bowl over a pan of simmering water. Off the heat, rub the sugar and zest together between your fingers until the sugar is moist, grainy, and very aromatic. Whisk in the eggs, followed by the lemon juice.
Set the bowl over the pan and start stirring with the whisk. Cook the lemon cream until it reaches 180 degrees F. Whisk constantly until it's thick, opaque, and the whisk leaves tracks. This might take 10-15 minutes to get to 180 F.
As soon as it reaches 180F, remove the cream from the heat and strain it into the container of a blender. Let the cream stand, stirring occasionally, until it cools to 140 degrees F, about 10 minutes.
Turn the blender to high and, with the machine going, add the butter a few chunks at a time. Scrape down the sides of the container as needed as you incorporate the butter. Once the butter is in, keep the machine going for 3 minutes. Although it will look blended before then, this extended whipping will give it a light, mousse-like texture.
Pour the cream into a container, press a piece of plastic wrap against the surface to create an airtight seal and refrigerate at least 4 hours, or overnight. When you are ready to assemble the tart, just whisk the cream to loosen it and spoon it into the tart shell.
To assemble the tarts
Spray mini muffin tins with nonstick cooking spray and preheat the oven to 350 F. Dust a work station with flour and divide the tart dough in thirds. Keep two-thirds of it in the fridge and work with one third at a time. Roll it out very thinly on a floured surface with a floured rolling pin. Since we are making mini tarts the crust should be delicate and thin so it doesn't overwhelm the filling.
Use a large circular cutter to cut circles of tart dough--mine were about 3" wide. Gently lift the circles from the table and, one at a time, press them into the mini muffin cavities. Use a sharp knife or an offset spatula to trim the top and get a fairly smooth edge--it won't be perfect, but after they're baked they'll look fine. Freeze the first mini muffin tray while you form the second. If your dough gets too soft to work with, re-roll it and put it back in the freezer while you work with one of the chilled rounds in the fridge.
Once one of the muffin tins in the freezer is frozen, bake off the shells until they're light brown, about 10-12 minutes, rotating halfway throughout. Let them cool in the tins before attempting to remove, then gently slide them out and let them cool completely.
Fill with lemon cream (I found a pastry bag was easiest for this purpose) and top with season fruit or nuts.
Monday, September 27, 2010
TWD: Apple Tarte Fine
I made this week's Tuesdays with Dorie recipe, a slender apple tart with puff pastry, and it was oh so good.
But the real story belongs to the humble apples that went into the tart, and where they came from.
My friends, I went apple-pickin' this week! Brace yourselves for a plethora (a gaggle? a herd? a murder?) of apple-pickin' pictures, and please do say that to yourselves in a country accent in your heads. If you're not the apple-pickin' type, there is more tart deliciousness at the end of the post, so scroll on down. I won't mind too much.
My very favorite sous-chef, my ma (of Tuesdays with Mommie fame One, Two, and Three) was in town visiting. What better field trip than to drive an hour outside of Pasadena, into the mountains of San Bernadino, and visit Oak Glen, an apple-pickin' paradise?
Our first stop was Riley's Farm, which offers U-Pick apples, pears, and raspberries. We were wildly optimistic and decided we needed a half bushel of apples, and I foolishly opted for the raspberries too. Did you guys know raspberry bushes have wicked thorns? Truth.

We know a thing or two about fruit trees, but we still felt like city slickers in the midst of the apple groves, wandering around trying to figure out which varieties they were, and if they were really ripe. Most of the apples were fairly small and many seemed quite green, even when they pulled from the tree easily. When it seemed like all the good apples were high up in the branches, my mom took matters into her own hands and employed THE CLAW to pick the tree tops.
Jason disproved the common wisdom that "white men can't jump" and eschewed the wooden claw in favor of his own hands and impressive vertical leap:
By the end we had a box overflowing with freshly picked apples and pears, still warm from the summer sun. 
Next stop was Snow-Line Orchard. We already had more apples than we knew what to do with, so why a second apple farm stop?
I'll give you a hint:
Snow-Line is famous for their apple cider doughnuts. To look at them they don't seem so special. They're small, maybe 2 inches across, and rolled in a light coating of cinnamon and sugar. They're sold by the dozen, and not to flaunt our piggishness, but we easily polished off 2 dozen between the 3 of us.
They didn't have a strong apple flavor, but the cider did lend a deeper sweetness that was marvelous with the cinnamon-sugar on the outside. I honestly don't know what made them so good, but they were light, and crispy, perfectly fried and still soft on the inside. Our visit to Snow-Line consisted mostly of moaning and making these faces:
Once we got home and faced the mountain of apples, we knew we had to act fast. Fortunately, the Tuesdays with Dorie recipe this week called for apples (but, um, I'll need to make this tart 25 more times before I use up my stash).
I love the simplicity and elegance of this tart, but just like with the Parisian Apple Tart before it, I always make some modifications when baking apples in puff pastry, and I thought I'd share my tips to getting the perfect tart.
First suggestion: if you want clean lines around the tart, make a border. I prefer an even crust all along the outside, so after the tart is rolled out, I use a pizza cutter to cut thin (less than 1" strips) from the length and width of the rectangle. Brush the edges of the tart with a little egg wash, then press the strips along the outer edges of the tart. When it bakes up, you'll have a nice square shape, instead of lumpy edges with apples poking into them.
Second suggestion: cook the apples. I know, I know, the beauty of this tart is that it's so simple, and cooking the apples beforehand adds more time and complication. But honestly, every time I use this method I end up with apples that have dried out due to high heat and extended baking times. I prefer to take a little more time to make luscious apples that taste great, even after a long bake.
And really, sauteeing apples is pretty low-stress. I don't even measure, I just eyeball things. I put a good-sized chunk of butter (3 tbsp?) in an iron skillet and let it melt until it's foamy. Add a cup (or two!) of sugar, and slowly let it dissolve, stirring as little as possible. Squeeze some lemon juice on top to prevent crystallization. Let the sugar get to be a nice dark brown color, then add the apples. The caramel will seize--not to worry. As the apples cook, it'll liquify once again, and soon your apples will be swimming in a delicious caramel soup. You can add other things at this point--I added the seeds from a vanilla pod and a little cinnamon. Simmer until the apples are soft and have taken on some color, then remove them with a slotted spoon and let them cool. Once cool, you can arrange them on your pastry and you're good to go. They have an awesome flavor and stay nice and soft in the oven.
Bonus: keep the saucepan on the stove, add some cream, and cook it down. You now have a delicious apple-caramel sauce to put on your tart! It pairs wonderfully with vanilla ice cream and this warm apple tart:
We pretty much destroyed this tart in the space of one afternoon. I have no regrets. I'd do it all again. And with the mountain of apples staring me down, I just might!
Tuesday, September 21, 2010
A Tale of Two Tarts
Lately I've been making a lot of Monets.
No, I haven't taken up impressionist painting. I mean "Monets" in the Clueless sense of the word. Desserts that look amazing, but upon closer inspection--or tasting--leave something to be desired. This is tragic for a number of reasons--wasted hours and ingredients, for instance--but the biggest disappointment is that I'm left with pictures that I love, and a lackluster recipe to go with it. I couldn't possibly post the duds, right?
But then I thought, wait. Why should delicious desserts have all the fun? Shouldn't there be a place in our blogging world for the runners-up, the wannabes, the mediocre Monets? Of course!
I present A Tale of Two Tarts.
First up: Fresh Fig Tart with Rosemary Cornmeal Crust and Lemon Mascarpone Cream
As Dickens so eloquently wrote, it was the best of tarts, it was the worst of tarts. It was the tastiest of toppings, it was the grossest of crusts and fillings. A true literary and culinary genius, that Chuck Dickens.
I was gifted with a bounty of fresh figs, and after eating about a pound of them straight from the bag, decided to turn them into a tart. I don't always love the pulpy texture of cooked figs, so I decided to make a tart that used fresh figs instead. This recipe seemed perfect. The unique crust recipe called for fresh rosemary and cornmeal, and the filling was a mix of mascarpone cream, sour cream, and lemon zest. Fresh figs were sliced on top and finished with a light glaze.
I don't want to totally pan this recipe because I think it has potential. The crust was way too savory for me. I felt like I should scrape out the cream and serve it with chili. I think the idea of adding rosemary is good, but next time I would add some chopped rosemary to a traditional pate sucree recipe, to get the flavor without sacrificing a tender pastry. The cream was also a problem. I used homemade mascarpone, which was a bit stiffer than store-bought, so I had to work it to loosen it and it ended up breaking. Completely my fault, but it still wasn't so appetizing to have curdled cream inside a taco shell-esque crust, topped by fresh figs. Uh, yum?
Tart the second: David Lebovitz's Chez Panisse Almond Tart
My very first pastry job was at a bakery where we made a very similar almond tart, so I had all sorts of warm snuggly nostalgic feelings as I was making this tart. There's something comforting about the simplicity of a buttery crust, crunchy almonds, and chewy, creamy caramel holding it all together. What could go wrong?
Well, you could overbake the tart, for one thing. Make sure you forget to set the timer and lose track of how long it's been in the oven. Then grow paranoid that it's underbaked and you'll be serving raw tart to your guests (yes, you've invited guests to "enjoy" this tart) so bake it an extra 10 minutes, for good luck.
Then serve the tart with honey-vanilla ice cream, preferably on top of each slice, so the cold ice cream can make the caramel harden and become impossible to cut or bite through. Now sit back and watch your guests try their hardest to gracefully eat their slices.
Neither one of these recipes was a true disaster, and I do think that I'll make them again. I'm older, wiser, and know not to follow the cornmeal crust recipe, or overwork my mascarpone, or lose track of the time the almond tart has been in the oven. I mean, tarts this beautiful deserve to taste as good as they look, right?
Coming up next: mini tarts that are total Baldwins.*
*I fear the Clueless lexicon is perhaps not entirely appropriate for food writing.
Wednesday, August 04, 2010
Passionate Baking, Three Ways
Even before I'd ever tasted passion fruit, I fell in love with the name. Growing up surrounded by boring, utilitarian fruit names (are you listening, orange?), learning that there was a fruit that broke this mold was a revelation. It belongs on a soap opera! Of course I was intensely curious about its flavor. Did it taste like joy? Lust? REVENGE?
By the time I finally tasted passion fruit, my expectations were high, but fortunately they were met with equal passion. This fruit, with its distinctive floral tropical taste and sweet-sour bite, is one of my favorite flavors. I'm sure it's much more common in other cultures, but in my experience it's still relatively rare, making passion fruit desserts that much more interesting to me.
My local grocery store carries lots of Mexican brands, and for years I've seen Goya passion fruit puree in the frozen food aisle. I've tried making smoothies with it, but--spoiler alert--it doesn't play well with protein powder. Recently I decided to give it the respect it deserves and create a dessert that showcases passion fruit's best qualities, so I came up with these passion fruit truffles for the candy site.
Passion fruit, at least in my experience, is pretty tart. If you're eating the whole fruit, you need to let it sit and really ripen for awhile, until it wrinkles and all those starches turn to sugar and its natural sweetness comes out. Frozen fruit puree doesn't have the benefit of sitting for a week on the kitchen counter, so it needs some outside assistance to mellow the harsh edges of the passion fruit.
I used the puree to make a white chocolate ganache. The remarkable thing about this ganache is that almost all of the liquid is fruit juice--only a little bit is cream. Of course there's plenty of fat from the white chocolate, but the high juice ratio still makes it float a little bit lighter on the tongue, and glide down the throat a little easier than some heavier ganaches.
When you're making these truffles, you'll want to use good chocolate, the kind you buy in bars and chop up, the kind that you want to snack on while you're chopping. White chocolate chips have other additives that make them resistant to melting, and they don't taste like much of anything, so avoid them if you can.
The resulting passion fruit ganache is rich and creamy, with a light fruity taste that whispers of warm afternoons and island vacations, but with a white chocolate finish that brings your feet back down to the ground. The ganache sets somewhat loose, so you'll want to mold these truffles, instead of hand rolling them. Dusted with a sprinkling of gold luster dust, they look--and taste--like a million bucks. The full passion fruit truffle recipe is here.
But this passion fruit party is only starting. Because the other thing I didn't tell you about the ganache is that it makes a lot. A LOT. A-maybe-we-should-invite-the-neighbors-over-to-help-eat-all-these-truffles-lot. So if you're like me, and the thought of molding five dozen truffles doesn't appeal to you, you'll try to find other ways to use your extra ganache.
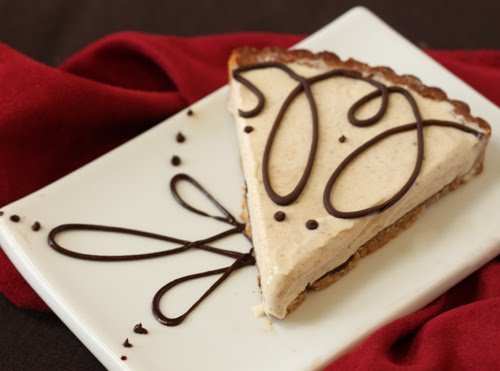
Solution #1: Chocolate Passion Fruit Tarts
The ganache was poured into miniature chocolate tart shells and topped with bittersweet chocolate shavings. That is the full extent of this recipe. Ganache. Tart shell. Bliss.
The shell is barely sweetened, and the crunch of the savory cocoa shell contrasting with the sweet-tart creamy ganache is heavenly. This is one of those showstopping desserts you want to keep up your sleeve to impress company, so after you receive all of their compliments, you can say--with the blush of honesty but with a twinkle in your eye--"It really was nothing."
My second attempt at reworking the passion fruit ganache was a little more elaborate but equally delicious:
Passion Fruit-White Chocolate Ice Cream
I incorporated some of the ganache into a custard ice cream base and churned it to produce an ice cream that had the signature passion fruit taste, tempered by the addition of more milk, more cream, and more sugar. This is a perfect introduction to the fruit for skeptics, and it paired beautifully with small cookies made from tart dough scraps.
Looks like my passion for passion fruit yielded the world's longest blog post. If you're still with me, and looking for recipes, they're right below the cut...
Passion Fruit Ganache
2 tbsp heavy cream
2 tsp light corn syrup
2/3 cup passion fruit juice or puree
9 oz good-quality white chocolate (not chips)
If you are using passion fruit puree, pass it through a mesh strainer to remove the solids from the juice, and discard the solids. Place the 2/3 cup of juice in a small saucepan with the light corn syrup and the heavy cream over medium-high heat. Bring this mixture to a boil.
Finely chop the white chocolate and put it in a heat-safe bowl. Once at a boil, pour the hot liquid over the white chocolate and immediately begin gently whisking to melt the white chocolate and emulsify the mixture. If you have a handheld immersion blender, use it to blend the passion fruit ganache together. Otherwise, just continue whisking until you have a silky smooth mixture with no bits of white chocolate remaining.
Press some cling wrap over the top of the ganache and refrigerate the bowl until the ganache has cooled, about 2 hours. Alternately, you can refrigerate it over night, and then take the bowl out of the refrigerator the following day and let it sit at room temperature until it loosens up.
Dark Chocolate Tart Dough
Adapted from Dorie's chocolate tart dough
1 1/4 Cups Plain flour
1/4 Cup Unsweetened cocoa powder
1/4 Cup powdered sugar
1/4 Tsp Sea salt
135g Very cold unsalted butter, cut into small pieces
1 Large Egg yolk
Put the flour, cocoa powder, sugar and salt in a food processor and pulse a few times to combine.
Scatter the pieces of butter over the dry mixture and pulse until you have butter pieces the size of oatmeal.
Stir the yolk with a fork and add it a little at a time, pulsing after each addition.
Process in long pulses (10 seconds each) until the dough comes together in clumps and curds.
Turn the dough to a lightly floured surface a knead briefly in order to incorporate the dry ingredients that might have escaped the mixing.
Press into tart shells and freeze before baking at 350 for 10-12 minutes.
Passion Fruit Ice Cream
About 1.5 cups passion fruit ganache, loose and at room temperature
3/4 cup heavy cream
1 cup of whole milk
4 large egg yolks
1/2 cup of sugar
Bring the milk and the cream to a boil in a medium heavy bottomed saucepan.
Meanwhile, in a medium bowl, whisk the yolks and sugar together until well blended and just slightly thickened. Still whisking, drizzle in about one third of the hot liquid-this will temper, or warm, the yolks so they won't curdle.
Whisking all the while, slowly pour in the remaining liquid. Pour the custard back into the pan and cook over medium heat, stirring without stopping, until the custard thickens slightly and coats the back of a spoon. I always use a thermometer and shoot for 175 degrees F.
Immediately remove the pan from the heat and slowly and gently stir the custard into the ganache. Cover the ice cream base with cling wrap and refrigerate until completely cool. Churn in your ice cream maker according to the manufacturer's directions.
