Showing posts with label candy. Show all posts

Tuesday, April 19, 2011

Easter Parade: Easter Egg Candies & More

Stick a fork in me, I am done.

Or, for a more Easter-appropriate figure of speech, hard-boil me and dye me. Okay, that one is weird.

Belabored metaphors aside, it's been a long couple of weeks months in the kitchen. I do love the holidays but I am so excited for a break from intensive candy-making/recipe development. Never have I been so glad there is no such thing as "Mother's Day candy recipes." With the end of the big candy holidays I am looking forward to a little more free time to cook for myself, get this blog up and running again, and--best of all!--launch a huge blog redesign. And not a second too soon. This place is a little dusty.

So dusty, in fact, I have a bunch of old photos that never made it into blog posts. These were last week's absolutely delicious strawberry-rhubarb double crisps. Sweet, tangy, with a brown sugar crumble studded with candied ginger, they were seriously good. Too bad they're old news!


You know what's not old news? Passover and Easter goodies! Here are a few things I've made lately that are floating around the internet. Maybe you'll find something to enjoy for your April holiday of choice!

Matzo Toffee for Passover: Photo Recipe


Coconut-Almond Macaroons for Passover: Photo Recipe


Easter Basket Cookies: Photo Recipe


Easter Egg Cake Pops: Recipe, Photo Tutorial


Marshmallow Chicks: Recipe, Photo Tutorial


Easter Bunny Truffles: Recipe, Photo Tutorial


Easter Basket Candies: Recipe, Photo Tutorial


Panoramic Sugar Easter Egg: Recipe, Photo Tutorial


Happy Passover! Happy Easter! Happy Eight-Hours-Of-Sleep-A-Night!

Read More...

Thursday, December 09, 2010

Make Your Own Candy Cane Joe-Joes

I don't know what I would do without my local Trader Joe's grocery store. Where else would I go with a shopping list 3 items long and leave an hour later, $70 poorer and with four overflowing shopping bags stuffed to the brim with impulse buys like chocolate-covered soybeans and freeze-dried mangoes? Yes, Trader Joe's is a magical place, and despite the danger to my wallet, I keep going back, because so many of their products are so darn good.

Take the Candy Cane Joe-Joe's, for instance: an Oreo-like cookie with a cream filling studded with candy cane pieces. Chocolatey, minty, crunchy, creamy... Can it get any better?

Well, actually...
I really like Candy Cane Joe-Joe's for what they are: a tasty mass-produced, industrially made cookie. But how could they possibly compare to homemade cookies, made fresh, with quality ingredients?

Um, they can't.

Which is why I'm here to share this recipe for homemade Candy Cane Joe-Joe's with you.

I'm not going to sugar-coat it: this recipe can be a bit time-consuming if you share my nitpicky tendencies and want all of your chocolate wafers to be uniform. That'll require lots of rolling, cutting, re-rolling, chilling, et cetera. So budget some time for that, and then meet me at Obsessives Anonymous at 7pm sharp. I'll bring identically-sized treats.

OR you can throw caution to the wind, and just roll the dough into balls and flatten them with a drinking glass. If you go this route, the recipe is a snap to put together: a quick-mixing dough, a short baking time, and a super-fast buttercream of the powdered sugar-and-butter variety.

And the crushing of candy canes. Can't forget that crucial aspect. Get your heaviest rolling pin and your pent-up angst, it's about to get real.

I also recommend that you be judicious with the use of pink food coloring, otherwise your Joe-Joe's will have an alarming shade of pink on the inside, as mine so helpfully demonstrate above. But that's just one more thing that makes them charmingly homemade. Sorry Trader Joe's...you can do many things, but these cookie have you beat.

These are a MUST for my holiday Christmas plates every year, but I'm still planning out the rest of my holiday baking. What are your must-makes during the holidays?


Homemade Candy Cane Joe-Joe's

Cookie recipe adapted from Bon Appetit, Dec 2005

Cookies
* 1 3/4 cups all purpose flour
* 1/2 cup unsweetened cocoa powder (preferably Dutch-process)
* 1/4 teaspoon salt
* 1 cup sugar
* 3/4 cup (1 1/2 sticks) unsalted butter, room temperature
* 1 large egg

Filling
* 3 cups powdered sugar
* 1 stick unsalted butter, softened to room temperature
* 2 tbsp milk at room temperature
* 1/2 tsp mint extract
* 1/8 tsp salt
* drop of red or pink food coloring

* 4 large candy canes

For cookies:

Whisk flour, cocoa, and salt in medium bowl to blend. Using electric mixer, beat sugar and butter in large bowl until well blended. Beat in egg. Add dry ingredients; beat until blended. If you want to roll it out, refrigerate the dough 1 hour.

Preheat oven to 350°F. Line 2 baking sheets with parchment paper. Roll the dough between two sheets of parchment paper until it is a little less than 1/4" thick. Use a small circular cutter to cut 2" circles of dough out and place them on the baking sheets. If the dough is still chilled, re-roll and cut out more circles, otherwise, chill it briefly until it is firm enough to work with. Continue until all of the dough has been shaped into circles.

Alternately, scoop out dough by level tablespoonfuls, then roll into smooth balls. Place balls on prepared baking sheets, spacing about 2 inches apart. Using bottom of glass or hands, flatten each ball to 2-inch round (edges will crack).

Bake until cookies no longer look wet and small indentation appears when tops of cookies are lightly touched with fingers, about 9-11 minutes (do not overbake or cookies will become too crisp). Cool on sheet 5 minutes. Transfer chocolate cookies to racks and cool completely.

For filling:
Sift the powdered sugar. In the bowl of an electric mixer fitted with the paddle, beat the butter and powdered sugar until combined--it will look crumbly. Add the milk in a slow stream, then the mint extract and the salt.

Once combined, scrape down the sides of the bowl and the paddle, then turn the mixer to medium speed and beat until light and fluffy, 2-3 minutes. Add a drop or two of red or pink food coloring.

Assembly

When you're ready to assemble the cookies, put the unwrapped candy canes in a large Ziploc bag and use a rolling pin to crush them into very fine pieces, almost crumbs. You could also use a food processor for this task. The crumbs get sticky if exposed to air for long periods of time, so save this step until you're ready to use them.

Pipe or spread 2 generous teaspoons of filling evenly over flat side of 1 cookie to edges; top with another cookie, flat side down, pressing gently so that the filling comes all the way to the edge of the cookies.

Place the crushed candy canes on a plate or in a shallow bowl. Roll the edges of the cookie sandwiches in crushed candies.

Read More...

Thursday, September 09, 2010

Things I Have Been Doing Instead of Blogging Here

I have to tell you a secret, but you have to promise to not get mad. The truth is, I make a lot of things that I never get around to blogging about. I know, shocking. It's not that they're not good, or that the photos didn't turn out, it's just that the act of baking and photographing is so much easier for me to fit into my day than the work of blog writing. I suspect this is a problem many of us have. It is something I'm working on--or, more realistically, something I'm hoping to plan on intending to work on--but in the meantime, I wanted to share some other fun things I've been doing around these here internets that haven't made it onto Cake or Death.


Okay, so the holiday technically started last night, but it's not too late to make honey cake! This one is moist and really flavorful, with lots of spices. I put together this recipe for the Oh Nuts blog, and you can find it on their site with lots of step-by-step pictures.

Deep-Fried Candy Bars Video

I've started making lots of video tutorials for About.com, and these are one of my favorites. You can practically smell the oil frying when you watch it. I did deep-fried candy bars and deep-fried Oreos on the same day, but in my opinion, the candy bars are waaaay better. I still have to try Twinkies, though! Anyone here done those yet?

Candy Sushi Video

Another video recipe for About. The trickiest thing about this, no lie, is finding green fruit roll-ups. I'm beginning to think the market's fixed, because every grocery store I visited was full of tie-dyed and rainbow and stamped roll-ups, but finding plain colored ones was ridiculously difficult. As soon as I get my personal blogging sorted out, I'm going to write an expose blowing the lid off the fruit roll-up industry.

Banana Split Truffles Tutorial

No video recipe here, just a good old-fashioned photo tutorial showing how to make these adorable banana split truffles. The filling is a banana-white chocolate ganache, and then the dipped truffles are decorated to look like the world's cutest army of mini ice cream sundaes. This decorating technique is also perfect for banana cupcakes: just use an ice cream scoop to top them with a scoop of buttercream, and drizzle them with chocolate ganache and all the fixin's.

Read More...

Wednesday, August 04, 2010

Passionate Baking, Three Ways

Even before I'd ever tasted passion fruit, I fell in love with the name. Growing up surrounded by boring, utilitarian fruit names (are you listening, orange?), learning that there was a fruit that broke this mold was a revelation. It belongs on a soap opera! Of course I was intensely curious about its flavor. Did it taste like joy? Lust? REVENGE?

By the time I finally tasted passion fruit, my expectations were high, but fortunately they were met with equal passion. This fruit, with its distinctive floral tropical taste and sweet-sour bite, is one of my favorite flavors. I'm sure it's much more common in other cultures, but in my experience it's still relatively rare, making passion fruit desserts that much more interesting to me.


My local grocery store carries lots of Mexican brands, and for years I've seen Goya passion fruit puree in the frozen food aisle. I've tried making smoothies with it, but--spoiler alert--it doesn't play well with protein powder. Recently I decided to give it the respect it deserves and create a dessert that showcases passion fruit's best qualities, so I came up with these passion fruit truffles for the candy site.

Passion fruit, at least in my experience, is pretty tart. If you're eating the whole fruit, you need to let it sit and really ripen for awhile, until it wrinkles and all those starches turn to sugar and its natural sweetness comes out. Frozen fruit puree doesn't have the benefit of sitting for a week on the kitchen counter, so it needs some outside assistance to mellow the harsh edges of the passion fruit.

I used the puree to make a white chocolate ganache. The remarkable thing about this ganache is that almost all of the liquid is fruit juice--only a little bit is cream. Of course there's plenty of fat from the white chocolate, but the high juice ratio still makes it float a little bit lighter on the tongue, and glide down the throat a little easier than some heavier ganaches.

When you're making these truffles, you'll want to use good chocolate, the kind you buy in bars and chop up, the kind that you want to snack on while you're chopping. White chocolate chips have other additives that make them resistant to melting, and they don't taste like much of anything, so avoid them if you can.


The resulting passion fruit ganache is rich and creamy, with a light fruity taste that whispers of warm afternoons and island vacations, but with a white chocolate finish that brings your feet back down to the ground. The ganache sets somewhat loose, so you'll want to mold these truffles, instead of hand rolling them. Dusted with a sprinkling of gold luster dust, they look--and taste--like a million bucks. The full passion fruit truffle recipe is here.

But this passion fruit party is only starting. Because the other thing I didn't tell you about the ganache is that it makes a lot. A LOT. A-maybe-we-should-invite-the-neighbors-over-to-help-eat-all-these-truffles-lot. So if you're like me, and the thought of molding five dozen truffles doesn't appeal to you, you'll try to find other ways to use your extra ganache.

Solution #1: Chocolate Passion Fruit Tarts

The ganache was poured into miniature chocolate tart shells and topped with bittersweet chocolate shavings. That is the full extent of this recipe. Ganache. Tart shell. Bliss.
The shell is barely sweetened, and the crunch of the savory cocoa shell contrasting with the sweet-tart creamy ganache is heavenly. This is one of those showstopping desserts you want to keep up your sleeve to impress company, so after you receive all of their compliments, you can say--with the blush of honesty but with a twinkle in your eye--"It really was nothing."

My second attempt at reworking the passion fruit ganache was a little more elaborate but equally delicious:

Passion Fruit-White Chocolate Ice Cream


I incorporated some of the ganache into a custard ice cream base and churned it to produce an ice cream that had the signature passion fruit taste, tempered by the addition of more milk, more cream, and more sugar. This is a perfect introduction to the fruit for skeptics, and it paired beautifully with small cookies made from tart dough scraps.

Looks like my passion for passion fruit yielded the world's longest blog post. If you're still with me, and looking for recipes, they're right below the cut...


Passion Fruit Ganache


2 tbsp heavy cream
2 tsp light corn syrup
2/3 cup passion fruit juice or puree
9 oz good-quality white chocolate (not chips)

If you are using passion fruit puree, pass it through a mesh strainer to remove the solids from the juice, and discard the solids. Place the 2/3 cup of juice in a small saucepan with the light corn syrup and the heavy cream over medium-high heat. Bring this mixture to a boil.

Finely chop the white chocolate and put it in a heat-safe bowl. Once at a boil, pour the hot liquid over the white chocolate and immediately begin gently whisking to melt the white chocolate and emulsify the mixture. If you have a handheld immersion blender, use it to blend the passion fruit ganache together. Otherwise, just continue whisking until you have a silky smooth mixture with no bits of white chocolate remaining.

Press some cling wrap over the top of the ganache and refrigerate the bowl until the ganache has cooled, about 2 hours. Alternately, you can refrigerate it over night, and then take the bowl out of the refrigerator the following day and let it sit at room temperature until it loosens up.


Dark Chocolate Tart Dough
Adapted from Dorie's chocolate tart dough
1 1/4 Cups Plain flour
1/4 Cup Unsweetened cocoa powder
1/4 Cup powdered sugar
1/4 Tsp Sea salt
135g Very cold unsalted butter, cut into small pieces
1 Large Egg yolk

Put the flour, cocoa powder, sugar and salt in a food processor and pulse a few times to combine.
Scatter the pieces of butter over the dry mixture and pulse until you have butter pieces the size of oatmeal.
Stir the yolk with a fork and add it a little at a time, pulsing after each addition.
Process in long pulses (10 seconds each) until the dough comes together in clumps and curds.
Turn the dough to a lightly floured surface a knead briefly in order to incorporate the dry ingredients that might have escaped the mixing.
Press into tart shells and freeze before baking at 350 for 10-12 minutes.


Passion Fruit Ice Cream

About 1.5 cups passion fruit ganache, loose and at room temperature
3/4 cup heavy cream
1 cup of whole milk
4 large egg yolks
1/2 cup of sugar

Bring the milk and the cream to a boil in a medium heavy bottomed saucepan.

Meanwhile, in a medium bowl, whisk the yolks and sugar together until well blended and just slightly thickened. Still whisking, drizzle in about one third of the hot liquid-this will temper, or warm, the yolks so they won't curdle.

Whisking all the while, slowly pour in the remaining liquid. Pour the custard back into the pan and cook over medium heat, stirring without stopping, until the custard thickens slightly and coats the back of a spoon. I always use a thermometer and shoot for 175 degrees F.

Immediately remove the pan from the heat and slowly and gently stir the custard into the ganache. Cover the ice cream base with cling wrap and refrigerate until completely cool. Churn in your ice cream maker according to the manufacturer's directions.

Read More...

Tuesday, June 01, 2010

Oh Dandy It's Candy

Can I take a moment before I begin to just say I am SO glad that it is finally June. I feel like May came and ran me over like a Mack truck. Don't get me wrong, it was full of good things, but I was left exhausted and feeling (and possibly looking) like roadkill.

This past month, in addition to my brother's wedding and the wedding cake I made for him, my husband (FINALLY) finished his PhD program and got all gradumacated:


And then we had a series of houseguests, and then I took a whirlwind trip to Chicago for that grand sugar extravaganza, the Sweet & Snacks Expo. The Expo is the biggest candy trade show in the country, and it's absolutely overwhelming. All the big players come and set up enormous booths, and of course there's hundreds of smaller companies as well. Here's a quick photo tour of the Expo.

There were enormous inflatable and fluffy mascots of all descriptions.

There were lots of new "brand extensions" of familiar products. Look for new versions of Snickers, Twix, Milky Way, and 3 Musketeers this summer and fall, as well as these Reese's minis, adorable dime-shaped cups that come ALREADY UNWRAPPED. Can you believe it took them until 2010 to think of this? Glory hallelujah.
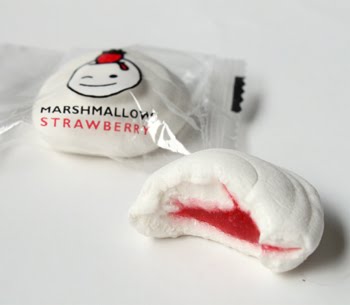
There were also more unusual products, like these fruit jelly-stuffed marshmallows...
...and these popping candies to sprinkle on ice cream, yogurt, and even vegetables......and chocolate truffles shaped and served like martini olives...

...and my favorite unique product, Le Whif inhalable chocolate. The canister is filled with chocolate powder that you inhale, so that you get the taste of chocolate without any of the calories.
I couldn't resist taking a hit every now and then. But really, I can stop any time that I want to.After two days at the Expo, I ended up with about 30 lbs of candy. Fortunately I've been through this drill before, so I packed a duffel into my regular suitcase to cart it all home in. It was dreadfully inconvenient to carry around O'Hare, but I tried to remind myself that I needed to burn all the extra calories I could, to make up for my all-candy diet of the past few days.
Over the weekend I finally had a chance to sort it all, organize it, and photograph most of it. It went into 4 piles: gum and mints, to keep and review, to keep and eat but not review, and to give away. The review pile is the big one in the middle.

So all of this is an extremely long-winded way of saying: I didn't make this week's TWD recipe! I feel like if I were to add one more sweet substance to my house, it would spontaneously combust in a cloud of sugar. BUT I am excited to see everyone else's finished product, and I actually have a fun baklava and sorbet recipe I'll be posting later this week.

If you are interested in learning more about the Expo, I have some additional write-ups on the candy blog.

Read More...

Wednesday, February 10, 2010

Valentine's Day Candies

If the garlands of red roses and stacks of heart-shaped chocolate boxes and giant inflatable Cupids in stores haven't tipped you off already, allow me to warn you: Valentine's Day is nearly here. If you're looking for fun V-day sweets, here are some cute things I've recently been featuring on the candy website:

Homemade Conversation Hearts (link is to a photo tutorial)
Now you'll never be stuck passing out lame messages like "Tweet Me" and "UR A 10." With a set of food-safe markers, you can make the sassiest, funniest, in-jokiest candies to put Necco to shame.

Tuxedo Strawberries (link is to a photo tutorial)
Love, love, LOVE the look of these. The only downside is that it made me talk to my food more often and made me slightly more reluctant to eat them. I would pick one up and say, "Aren't you a handsome devil today?!" and then feel guilty about biting his head (or would that be feet?) off.

Aka, brownie pops with a Valentine's twist. These can also be made with regular cake, banana bread, pound cake, etc. I used a cutter for the hearts, but cut the tulips and lips out freehand, and the recipe includes tips for how to do this.

Happy Valentine's Day! What are YOU making to celebrate?

Read More...

Sunday, March 29, 2009

Easter Candy Giveaway!

Update: we have our winners for the giveaway! The random number generator picked comments from Danielle and Matzoh Fairy. Congratulations, you guys! Your candy will be in the mail soon!


So one of the (many) perks of my job as the candy guide at About.com is that people send me candy for promotional consideration and review. All the time. It's a hard life, coming home to find a big box of gourmet chocolates or licorice on the stoop. Sigh. Usually I have no problem polishing it off myself--it's my job, after all! And if I can't finish it, my husband bravely steps in to help.

However, this most recent box has bested us. I just got a huuuuge box of assorted Easter candy, and we're up to our eyeballs in sweets at our house already. We just can't eat it all! This is where you come in. There is some good stuff here--chocolate from Lindt, Toblerone, Mars, and Hershey, and sugar candy like Peeps, jelly beans, Hot Tamales, and licorice. Also some really random candy I've never seen before!

Want to win a box of Easter candy? Today's your lucky day! Leave a comment to this blog entry before midnight on Wednesday, April 1st, Pacific time, and tell me what your favorite Easter candy is. I'll use the random number generator to pick two winners--yes, two, because there really is a lot of candy. I'll try and split it up so that the two winners get equal parts chocolate and sugary stuff. And, many apologies, but I'm going to limit it to folks in the US, for shipping reasons. Good luck!

Read More...

Saturday, January 31, 2009

The Best Football You'll Ever Eat

"All right, gang, huddle up!"
"This is the Superbowl, so ya gotta bring your A-game. Johnson, go long for the pass from Brown. Franklin, don't let their guys get within 10 yards of Burton. Smith, stand around and look delectable."

"25, 31, 14....hut, hut, hike!"
"They've got the ball! Go in for the tackle!"
That's right, what's better than watching the Superbowl this Sunday? (Um, everything?) How about eating footballs instead? These adorable and delicious candies have a fudgy peanut butter and chocolate filling, covered in chocolate candy coating and decorated to look like mini footballs.

Apologies to any fans who are appalled at my faux-football terminology and dialogue above. It should be obvious that I know nothing about football--I had to google a picture of a football to know how to decorate them!--but I do know I love eating them.
Recipe under the cut!


Chocolate Footballs
Recipe first appeared on my candy site

4 tablespoons (2 ounces) butter, softened to room temperature
1 cup peanut butter, smooth or chunky (not natural)
2 cups powdered sugar
1/2 cup unsweetened cocoa powder
1 tsp vanilla extract
1/2 tsp salt
1 tbsp + 1 tsp milk
8 ounces chocolate candy coating
2 ounces white candy coating

1. Prepare a baking sheet by lining it with aluminum foil and set aside for now.

2. Place the peanut butter and softened butter in the bowl of a large stand mixer fitted with a paddle attachment. (Alternately, you can place them in a large bowl and use a hand mixer.) Mix on medium speed until creamy and well-combined, scraping down the sides of the bowl several times.

3. Stop the mixer and add the powdered sugar, cocoa, salt, and vanilla. Turn the mixer to low and mix until the peanut butter is well-distributed. Stop the mixer and scrape down the sides very well, and mix again on low. At this point the mixture will look very dry and crumbly.

4. Add the milk and mix on low, continuing to mix until the candy moistens and comes together, scraping down the sides of the bowl as necessary. (This may take a few minutes.) Once it has come together, squeeze some of it into a ball in your hands to check the texture. It should hold together smoothly, without cracking or crumbling, but not be too moist. If necessary, add a little more milk, a half-teaspoon at a time, to get a consistency that you can comfortably work with and mold.

5. Using a teaspoon or a small candy scoop, form the candy into 26 balls and place them on the foil baking sheet. Elongate each ball and pinch the ends into points, so that they are football-shaped. The footballs should be approximately 1.5 inches long and 1 inch wide. (You can vary the size to get fewer or more footballs out of the recipe.) Continue until all the candy is formed into footballs. Refrigerate while you prepare the chocolate candy coating.

6. Place the chocolate candy coating into a microwave-safe bowl. Microwave until melted, stirring after every 45 seconds to prevent overheating. Stir until completely fluid and free of lumps.

7. Using a fork or dipping tools, dip a football into the melted candy coating, submerging it completely. Remove it from the coating and allow excess to drip back into the bowl. Replace the dipped football on the foil-lined baking sheet, and repeat with remaining footballs and candy coating. Return the footballs to the refrigerator to set while you prepare the white candy coating.

8. Place the white candy coating into a small microwave-safe bowl. Microwave until melted, stirring after every 45 seconds to prevent overheating. Stir until completely fluid and free of lumps. Scrape it into a pastry bag fitted with a small round tip, or a Ziploc bag. Cut a tiny hole in the corner of the bag to pipe the chocolate.

9. Decorate the footballs by drawing white circles around the edges, and laces in the middle of the balls. Allow to set completely. If desired, you can cut the excess pooled chocolate from the base of the footballs to make them look neater. Footballs can be stored in an airtight container in the refrigerator for up to two weeks. Bring to room temperature before serving.

Read More...

Monday, December 22, 2008

Christmas Baking, Part 1

No TWD for me this week...the house is already stuffed to the rafters with sugary sweets, and the thought of adding butterscotch pudding to the mix didn't excite me at all. However, I did happen to make some things I think are even better than pudding: Christmas cookies and candy! I got medieval with the mixer this past weekend and churned out six cookies/candy for gift giving this year. Here's the first wave of goodies:

Coconut-Lime Macaroons
I love the combination of coconut and lime. I have a coconut-lime truffles recipe that regularly haunts my taste buds, but I wanted something that would hold up a little better than delicate truffles on a cookie platter. These miniature macaroons were dipped in green-tinted white chocolate and given a chocolate drizzle to dress them up a bit.

Walnut Fudge
This is actually my father-in-law's recipe. He's famous for making huge blocks of fudge and giving it away each Christmas. He also does a white chocolate version, but my heart belongs to this semi-sweet variety. It's really easy--no candy thermometer or beating required--but I like it much better than other "easy" fudge recipes that call for condensed milk or marshmallow cream. It's perfectly smooth and rich and, to me, what an ideal fudge should be.

Almond-Cinnamon Toffee
Jason loves toffee, but I rarely make it for him. Poor little lamb! So he was really psyched to see that I made it for the gift plates this year, since it means lots of scraps for him. You can bet he was praying for lots of mistakes and awkwardly broken pieces while I was divvying it up. This toffee has just a touch of cinnamon in it to give it a subtle holiday taste. I mostly like it because it doesn't get unpleasantly chewy or sticky.

The recipes are under the cut below. Stay tuned tomorrow for the rest of the Christmas baking! And, because I love reading about sweets almost as much as I love eating them, tell me what you're making for Christmas this year!


Okay, I lied, I don't have a recipe for these lime-coconut macaroons! Truthfully, I didn't like the recipe I used, and ended up tweaking it a zillion different ways to get it to work. Pass! So if you have a fail-safe macaroon recipe, I'd love to hear it! I want one that's golden brown and crunchy on the outside, but really nice and moist on the inside. Is whipping the egg whites the secret? Do tell me all. I can tell you that adding the zest of two limes and some fresh-squeezed lime juice makes them taste fab. See, it's a barter system.


Almond-Cinnamon Toffee
Adapted from my Cinnamon Hazelnut Toffee recipe
* 1 cup (2 sticks) butter
* 1 cup granulated sugar
* 2 tbsp water
* 1 tbsp light corn syrup
* 1 tsp ground cinnamon
* 1 cup chopped toasted almonds
* 1.5 cups semi-sweet chocolate chips

1. Prepare a baking sheet by lining it with aluminum foil and spraying the foil with nonstick cooking spray. Set it aside. Grind 1/4 cup of the almonds in a food processor, or finely chop with a knife. Coarsely chop the rest of the almonds.

2. Melt the butter in a medium saucepan over medium heat. Once it is melted, remove it from the heat and stir in the sugar. Once the sugar is mixed in, add the water and corn syrup and stir until well-incorporated.

3. Place the pan back on the heat and insert a candy thermometer. Cook over medium heat, stirring often, until the candy reaches 290 degrees. Watch it carefully near the end, as it can easily burn at high temperatures.

4. Once the candy reaches 290 degrees, remove it from the heat. Stir in the cinnamon and the coarsely chopped nuts, and immediately pour the candy onto the prepared baking sheet. Tilt the sheet several times to spread the candy in a thin layer. Allow the toffee to sit at room temperature until it is completely cool.

5. Place the chocolate chips in a large microwave-safe bowl, and microwave until melted, stirring after every minute to avoid overheating.

6. Spoon half of the melted chocolate on top of the toffee, and spread it in a thin, even layer over the top. Sprinkle half of the finely chopped nuts on the wet chocolate. Place the toffee in the refrigerator to set the chocolate for about 15 minutes.

7. Remove the toffee from the refrigerator and lift it from the baking sheet. Flip the toffee over so that the chocolate side is now resting on the bottom of the baking sheet. Spoon the remaining melted chocolate over the top of the toffee and spread it evenly. (If necessary, re-warm the chocolate briefly so that it is spreadable). Sprinkle the remaining finely chopped nuts on the chocolate.

8. Refrigerate the toffee again to set the chocolate. Once set, break the candy into small pieces with your hands. Store the toffee in an airtight container in the refrigerator or in a cool room.

Easy Walnut Fudge
Recipe also on the candy site
* 4-1/2 cups granulated sugar
* 1 (12 oz) can evaporated milk
* 18 oz semi-sweet chocolate chips
* 1/2 lb butter, cut into small pieces
* 1 teaspoon vanilla
* 2 cups chopped walnuts

1. Spray a 9”x 13” pan with cooking spray, or cover with foil.

2. Combine sugar and evaporated milk in a large, heavy-bottomed pot over medium heat. Stir continuously and boil for six minutes.

3. Remove from heat, and add butter, chips, and vanilla. Continue stirring until the chips and completely melted and the mixture is smooth.

4. Add the chopped nuts and stir to incorporate. Pour into prepared pan.

5. Ideally, this should cool at room temperature overnight, but if you are in a hurry or if it is especially warm, it can be put in the refrigerator to harden. Slice into small squares and serve when firm.

Read More...