Showing posts with label cookies. Show all posts

Friday, April 29, 2011

Double Coconut Macaroons and Chia Gel

If I were to ask you what coconut macaroons and chia gel had in common, you might think it was a trick question. (You might actually think I was making up the concept of "chia gel" entirely, but I assure you--it's a thing. And only tangentially related to the chia pet.)

Yes, they're both two-word phrases, and yes, they both contain vowels. But beyond that, they're both goodies that I made yesterday to carry me through my first 50-mile run of the season, happening bright and early tomorrow morning. (!!!)

I'll ease you in gently with the macaroons.


I'm definitely a solid food girl when it comes to long-distance running. My stomach can't really handle energy drinks or gels in large quantities, but I can usually eat food without a problem. I enjoy my fair share of gummy bears and peanut M&Ms, but I try to stick to reasonably healthy foods for the most part--PB&Js, potatoes, bananas, etc. I prefer to make my own sweet treats as opposed to eating the ready-made stuff, because I know exactly what goes in them and I can try to make them healthy-ish (while making sure they still contain plenty of chocolate!)


I made a batch of mini Double Coconut Macaroons for my race. Instead of the usual sugar + butter + egg whites holding the coconut together, they get their goo factor from homemade coconut butter (basically just ground coconut) and maple syrup. They have the crisp outer shell and moist interior of the best sorts of macaroons, but with some healthier ingredients. I also added vanilla extract, almond extract, cinnamon, and of course, mini dark chocolate chunks. Put these puppies in a little baggie, and I'm ready to rock the trails!

Now let's talk ch-ch-ch-chia.


Chia seeds are native to Mexico and Central America and have been eaten as part of the native diets there for centuries, but it's only in the last few years that they've become the newest trendy "superfood." You can read more about their health benefits from this CNN article, but the short story is that they have lots of fiber, antioxidants, protein, and good fats. I first tried them a few years ago, but at the time I tried adding them to oatmeal and yogurt and wasn't very impressed. It's only in the last year that I've started making a chia gel to eat on my runs, and I've really grown to love it.

But I'm not going to lie, chia gel is weird. It starts out like this: a bowl of water, some supplements and flavoring, and the dry seeds.


Give it a little whisky-whisk, let it sit out for a few minutes, and you end up with this:


The soluble fiber in the seeds causes them to absorb the liquid and soften, and instead of crunchy little seeds you end up with something more gelatinous. I don't even know how to describe it, but they each have sort of a liquid force-field (gummy sack? goopy pouch?) around them:


I portion my gel out into little baggies, and suck one down about once an hour or so. Because it contains so much water it helps with nutrition and hydration, and provides lots of energy that seems to release over time, as opposed to the spike and crash of traditional energy gels and drinks.


Food is made, gear is packed, pre-race carbo loading is in full effect...I think I'm ready! Hope you all have fabulous weekends, and if you get a hankerin' for macaroons or chia gel, recipes are below.


Double Coconut Macaroons
Adapted from Oh She Glows

2 2/3 cups shredded unsweetened coconut (to make coconut butter)
2 (additional) cups shredded unsweetened coconut
3/4 cup pure maple syrup
1 vanilla bean
1 tsp. vanilla extract
1/2 tsp. pure almond extract
1/2 tsp. kosher salt
1 tsp cinnamon
1/2 cup mini dark chocolate chunks or chips (I like the Whole Foods store brand--very dark and flavorful!)

1. Preheat the oven to 300F and line a baking sheet with a non-stick mat or parchment. In a food processor, process 2 and 2/3 cups of shredded coconut for about 5-8 minutes until coconut butter forms. You will have to keep scraping down the sides of the bowl. For a coconut butter how-to, see this post. Alternatively, you can use 1 cup of store bought coconut butter.

2. Once you have made the coconut butter, mix all ingredients together in a bowl.

3. Scoop about 1-2 tbsp of dough onto a baking sheet. You don’t have to leave much room in between as they do not spread out. Bake for 20-28 minutes at 300F. I made minis so mine were done closer to 20 minutes, if you make standard-sized cookies they might take longer. Watch them closely after 22-23 minutes. They're done when they're golden around the edges.

4. Allow the macaroons to sit for 25 minutes so they can firm up. If you do not do this, the macaroons will crumble, so this step is crucial! Store in the fridge for up to 5 days in a sealed container. Makes about 22 large or 40-50 small macaroons.

Chia Gel
yield: 2 cups

Note: Chia seeds can be easily ordered online from many different websites. Amazon carries them, and I've gotten them for cheap on ebay before. They're also in many health food stores and my local Whole Foods has them in the bulk bin section.

2 cups water
2 tbsp powdered maca (optional, this is another "superfood" made from a root native to the Andes)
Electrolytes (optional, I use Nuun tablets or you could just add your favorite sports drink powder to the water)
Any other flavorings (sometimes I add lemon/lime zest, or even Crystal Light)
1/3 cup chia seeds

Whisk all ingredients together, and let them sit at room temperature until the chia seeds absorb some water and you have a gel. You can add up to 1/2 cup of seeds if you prefer a stiffer gel--mine is slurpable consistency. Portion it out into bags, or gel flasks, or whatever is easiest for you to carry around. I've had it last at least a week, but I can't say with any authority how long it's meant to last. Enjoy!

Read More...

Tuesday, March 29, 2011

Oh Yes I Did: Cinnamon Roll Sugar Cookies

Two words: sugar cookies.

Two more words: cinnamon rolls.

One question: can they be combined?


Oh, yeahhhhh.


This recipe-slash-BEST-IDEA-EVER comes courtesy of Jenny at Picky Palate. The second I saw it I bookmarked the page and returned regularly to drool, plan, and plot my way into making these cookies.


The idea couldn't be simpler. Take some sugar cookie dough and roll it out into a thin-ish sheet. (Mine worked best when it was about 1/4-inch thick.) Spread on some softened butter--I'm sorry, but it must be done--and then sprinkle liberally with brown sugar and cinnamon. Treat these babies like the cinnamon rolls they aspire to be!

Roll the dough, slice it into thick rounds, then bake it up. The cookies blossom into soft, sweet rounds with crisp edges and moist middles, with a buttery cinnamon swirl threaded throughout.


And did I mention the finishing touch? A drizzle of cream cheese icing, with a touch of vanilla or lemon, to complete the resemblance to cinnamon rolls, no yeast dough required.


I made these with leftover sugar cookie dough, and it's just about the best use for leftover dough I can imagine. The dough was fairly stiff and meant to be used to make precise cutout cookies. I suspect a soft dough that makes those pillowy round sugar cookies would work even better. If you'd like a recipe for the sugar cookies themselves, I'll refer you to the source at Picky Palate for further enlightenment.

Read More...

Monday, January 03, 2011

TWD: Midnight Crackles

HAPPY NEW YEAR!

How has this happened? I wasn't even used to saying twenty-ten yet, and now we're already on twenty-eleven. (Cue old-lady grumping about the passage of time and kids these days.)

We had an exciting New Year's Day. I'll give you a hint: it involved giant dragons...

...and marching bands...

...and horned frogs (ew)...

...and Paula Dean, y'all!

Yes, we had front & center seats for the Rose Bowl Parade! We live about 3 blocks from the parade route so we got together with some friends and camped out the day before and staked out some prime real estate. Let me tell you, people here take their parade viewing verrrry seriously.
Dibs started at 7am the day before the parade, and folks basically stayed in their spots for the next 24 hours on the street. It was pretty surreal to be camped out in front of the local Indian buffet at 3:30 AM, playing games, warming our hands by the fire in the BBQ, fending off cotton candy and bacon-wrapped hot dog vendors, and watching the next group over dance to salsa music all night. I love this town.

It was totally worth it, though. Where else could you see such a marvelous idea for a float?

But oh no, that's not all. For New Year's Eve our friends had a "Minute to Win It" party featuring ridiculous stunts, feats of strength, tests of skill, and general daring-do. It was delightful.


But enough about how well Jason juggles balloons, let's talk about cookies! I brought these Midnight Crackles to the NYE party, where they performed poorly in the Feats of Strength category but earned high marks in the Edible and Delicious category.
To make them more festive, I topped the cookies with edible gold star confetti. (From Michael's--expensive but pretty awesome.) They just needed something to make them pop visually, something that screamed Happy New Year!


Taste-wise, they were a little less exciting. I was hoping they'd have a soft, gooey center, but they were more cake-like. The flavor was nice, but it just wasn't the texture I was hoping for--adding some chunks of chocolate might also have helped.
But they were still tasty, and they still helped us ring in the new year on a sugar high, so what more can you ask for?

Read More...

Thursday, December 09, 2010

Make Your Own Candy Cane Joe-Joes

I don't know what I would do without my local Trader Joe's grocery store. Where else would I go with a shopping list 3 items long and leave an hour later, $70 poorer and with four overflowing shopping bags stuffed to the brim with impulse buys like chocolate-covered soybeans and freeze-dried mangoes? Yes, Trader Joe's is a magical place, and despite the danger to my wallet, I keep going back, because so many of their products are so darn good.

Take the Candy Cane Joe-Joe's, for instance: an Oreo-like cookie with a cream filling studded with candy cane pieces. Chocolatey, minty, crunchy, creamy... Can it get any better?

Well, actually...
I really like Candy Cane Joe-Joe's for what they are: a tasty mass-produced, industrially made cookie. But how could they possibly compare to homemade cookies, made fresh, with quality ingredients?

Um, they can't.

Which is why I'm here to share this recipe for homemade Candy Cane Joe-Joe's with you.

I'm not going to sugar-coat it: this recipe can be a bit time-consuming if you share my nitpicky tendencies and want all of your chocolate wafers to be uniform. That'll require lots of rolling, cutting, re-rolling, chilling, et cetera. So budget some time for that, and then meet me at Obsessives Anonymous at 7pm sharp. I'll bring identically-sized treats.

OR you can throw caution to the wind, and just roll the dough into balls and flatten them with a drinking glass. If you go this route, the recipe is a snap to put together: a quick-mixing dough, a short baking time, and a super-fast buttercream of the powdered sugar-and-butter variety.

And the crushing of candy canes. Can't forget that crucial aspect. Get your heaviest rolling pin and your pent-up angst, it's about to get real.

I also recommend that you be judicious with the use of pink food coloring, otherwise your Joe-Joe's will have an alarming shade of pink on the inside, as mine so helpfully demonstrate above. But that's just one more thing that makes them charmingly homemade. Sorry Trader Joe's...you can do many things, but these cookie have you beat.

These are a MUST for my holiday Christmas plates every year, but I'm still planning out the rest of my holiday baking. What are your must-makes during the holidays?


Homemade Candy Cane Joe-Joe's

Cookie recipe adapted from Bon Appetit, Dec 2005

Cookies
* 1 3/4 cups all purpose flour
* 1/2 cup unsweetened cocoa powder (preferably Dutch-process)
* 1/4 teaspoon salt
* 1 cup sugar
* 3/4 cup (1 1/2 sticks) unsalted butter, room temperature
* 1 large egg

Filling
* 3 cups powdered sugar
* 1 stick unsalted butter, softened to room temperature
* 2 tbsp milk at room temperature
* 1/2 tsp mint extract
* 1/8 tsp salt
* drop of red or pink food coloring

* 4 large candy canes

For cookies:

Whisk flour, cocoa, and salt in medium bowl to blend. Using electric mixer, beat sugar and butter in large bowl until well blended. Beat in egg. Add dry ingredients; beat until blended. If you want to roll it out, refrigerate the dough 1 hour.

Preheat oven to 350°F. Line 2 baking sheets with parchment paper. Roll the dough between two sheets of parchment paper until it is a little less than 1/4" thick. Use a small circular cutter to cut 2" circles of dough out and place them on the baking sheets. If the dough is still chilled, re-roll and cut out more circles, otherwise, chill it briefly until it is firm enough to work with. Continue until all of the dough has been shaped into circles.

Alternately, scoop out dough by level tablespoonfuls, then roll into smooth balls. Place balls on prepared baking sheets, spacing about 2 inches apart. Using bottom of glass or hands, flatten each ball to 2-inch round (edges will crack).

Bake until cookies no longer look wet and small indentation appears when tops of cookies are lightly touched with fingers, about 9-11 minutes (do not overbake or cookies will become too crisp). Cool on sheet 5 minutes. Transfer chocolate cookies to racks and cool completely.

For filling:
Sift the powdered sugar. In the bowl of an electric mixer fitted with the paddle, beat the butter and powdered sugar until combined--it will look crumbly. Add the milk in a slow stream, then the mint extract and the salt.

Once combined, scrape down the sides of the bowl and the paddle, then turn the mixer to medium speed and beat until light and fluffy, 2-3 minutes. Add a drop or two of red or pink food coloring.

Assembly

When you're ready to assemble the cookies, put the unwrapped candy canes in a large Ziploc bag and use a rolling pin to crush them into very fine pieces, almost crumbs. You could also use a food processor for this task. The crumbs get sticky if exposed to air for long periods of time, so save this step until you're ready to use them.

Pipe or spread 2 generous teaspoons of filling evenly over flat side of 1 cookie to edges; top with another cookie, flat side down, pressing gently so that the filling comes all the way to the edge of the cookies.

Place the crushed candy canes on a plate or in a shallow bowl. Roll the edges of the cookie sandwiches in crushed candies.

Read More...

Friday, November 26, 2010

Adventures in Cookie Dough Balls

It's the day after Thanksgiving, which means most of us are lolling around, trying to shake off yesterday's food coma while simultaneously justifying today's breakfast of pumpkin pie + whipped cream (vegetables and dairy!). So I really have no business posting about more desserts, especially desserts that are completely unrelated to pumpkins, apples, pilgrims, or Indians.

But.

I have recently been inducted into the mysterious world of cookie dough balls, and I really can't keep it to myself.


Cookie. Dough. Balls?

Oh yes. These are balls of cookie dough baked until barely set in the middle, so that they can be handled like a cookie but retain most of the taste and texture of cookie dough. Think they sound awesome? You're totally right.

I tried two very different recipes, one for chocolate chip, and one for peanut butter chocolate chip. I don't feel like either is my perfect recipe, so I'll probably keep tweaking them, but let's face it, I'm not going to kick these cookie dough balls out of bed, so I figured I'd share the love while I labor in the Cake or Death kitchen perfecting them.


First up: Chocolate Chip Cookie Dough Balls. These were basically a modified chocolate chip cookie dough, with less butter and more flour, baked cold so that they spread a bit less. While the end result was pretty tasty, I thought the dough needed more sugar, and the cookies were closer to actual cookies than dough balls, even though I baked them less than the time recommended.

The thing is, even imperfect cookie dough balls are still REALLY good. We polished these puppies off posthaste.


Next: peanut butter chip cookies. These were modified from a vegan recipe (hello, buttah) but they could easily be made vegan, since they don't have any eggs and you can re-substitute vegan margarine for the butter. The big difference in these cookies is that they use powdered sugar instead of granulated, which made a huge difference in the texture and produced a much stiffer dough without adding more flour.

The dough was actually too dry and crumbly for me, but after I added a little invert sugar, it held together well and produced this sexy beast:


Soft, melting, but with a slightly crisp exterior...these were seriously good. So if you haven't died of a sugar overdose yet, the recipes are below with my notes and suggested changes. And you'd better believe I'm going to keep fiddling with these until I find the perfect recipe...stay tuned.


Chocolate Chip Cookie Dough Balls
original recipe from The Chic Life, my changes in red brackets

1 1/2 cups unbleached all-purpose flour
1/2 tsp salt
1/4 tsp baking powder
1/8 tsp baking soda
1/2 cup brown sugar
3/4 stick butter, softened/room-temp
1 tbsp sugar [I would bump this way up, at least 1/3 cup. Next time I'm going to try powdered sugar instead of granulated, too]
1 egg (or flaxseed-egg)
1/2 tsp vanilla
1/2 cup semi-sweet chocolate chips [I used 1 cup and had no regrets]

In a large bowl, whisk together flour, salt, baking powder, baking soda.

In a medium bowl, mix sugars and butter till creamy. [I used a stand mixer, but DON'T beat these until light and fluffy. You don't want to add extra air, which will cause them to spread.] Add egg and vanilla and mix till combined.

Mix wet into the dry. Note: it will appear there is not enough liquid for the amount of dry ingredients, but continue mixing. It will form into a dough, it will just be a firm dough. Careful to not overmix.

Gently fold chocolate chips into the dough, without overmixing.

Refrigerate dough for at least 20 minutes before using a small sorbet scoop to scoop out dough into small mounds. Roll each mound into a ball and spread evenly on a baking sheet, leaving roughly 2-3 inches between each ball. Preheat oven to 350 and spread parchment on baking sheets.

Bake balls for 10-14 minutes, depending on how set you want your centers. [I baked for 9 and thought I could have gone a little less]. Let your dough balls rest on the baking sheet to cool at least 5-10 minutes.


Peanut Butter Cookie Dough Balls
original recipe from Peas and Thank You, my changes in red brackets

1/2 c. non-dairy margarine [I used sweet, sweet butter]
3/4 c. natural peanut butter [I used 1 cup]
1/2 c. organic brown sugar
3/4 c. organic powdered sugar
1/2 t. vanilla extract
1 t. baking powder
1/2 t. baking soda
3/4 t. salt
1 c. whole wheat pastry flour [I used 1.5 cups AP]
1/2 c. unbleached organic flour [see above]
1/2 c. natural peanut butter chips
1/2 c. non-dairy chocolate chips
[I added 2 tbsp invert sugar]**

Using a stand mixer, beat margarine, peanut butter, sugars and vanilla until fully incorporated.

In a separate bowl, combine baking powder, baking soda, salt and flours.

Add dry mixture to the mixer bowl a little at a time. Mix until a dough forms, add chips, c
combine and chill dough for 30 minutes.

preheat your oven to 350 degrees. Scoop dough with a mini ice cream scoop (or your fingers) and place balls on a cookie sheet. Bake for 10-12 minutes. [I baked for 10 minutes, they were perfect.] They’ll still be soft and look much like they did going in, but don’t overbake. Let the dough balls rest on the pan for a minute before transferring to a cooling rack.

**Invert sugar is a liquid with a consistency similar to corn syrup, composed of glucose and fructose. A good scientific overview can be found here. It's great to add to cookies if you want them to stay moist and gooey, and it's also great in candies to prevent crystallization and to keep ganache fudgy and soft.


Final Thoughts
I loved the addition of invert sugar--it made the cookies stay really soft and moist and doughy. However since it's not as readily available in grocery stores, I'd like to try to get to a recipe that produces the same effect with common sugars. I think the key is finding the right mix of brown, granulated, and powdered sugars to give them structure without drying them out. More experimenting to come!

Read More...

Tuesday, September 07, 2010

TWD: Peanut Buter Crisscrosses

The last time I made peanut butter cookies, I was less than impressed with the results. In fact, I got a little sassy and called the sorry flavorless cookies downright "wussy." (And I won't take it back!) So I was definitely ready to try a different peanut butter cookie recipe for this week's Tuesdays with Dorie recipe.

Plus, this time, I had a secret weapon!


Have you guys seen/tried peanut flour yet? I started reading about it on blogs this year, and then about a month ago my local Trader Joe's started carrying it. I immediately bought a bag, got it home, realized I didn't know WHAT to do with it, and stuck it in the back of the cupboard, where it languished until this past week. (One day I hope to be cured of my impulsive grocery-buying ways. Except not really.)

I'd read of people using it to flavor their smoothies and oatmeal--it packs a lot of protein and peanut flavor, with much less fat and calories than actual peanut butter. I hadn't read about people using it for baking, but someone's got to be the first, right?


Since I'd never baked with peanut flour before, I stayed conservative. I made a half batch, which called for 1.25 cups of flour, so I used 1 cup of AP and 1/4 cup of peanut flour. I also added teensy chocolate chips in addition to the chopped salted peanuts. I would have tried the cocoa powder variation, but I wanted to see how the batter worked with the peanut flour before adding any other variations to the mix.


Now of course, the problem with this experiment is that I didn't have a control group of cookies--ones baked without the peanut flour. (I never claimed to be a scientist!) So I can't really say how much the peanut flour changed the texture or flavor of these cookies. I can say that their texture didn't seem negatively affected at all--they were still soft in the middle with a crisp outside edge.


The flavor, too, was good. They didn't hit you over the head with their peanutty-ness, which is either good or bad depending on your tastes. I would have expected maybe a stronger peanut flavor, but maybe I have dull taste buds, or maybe it would have been even fainter without the peanut flour. I am curious to try it again and substitute even more peanut flour and see what happens. I can also see it being awesome in brownies or chocolate cookies, to give them a bit of a Reese's taste.

Q: Any other peanut flour users here? What recipes should I use it in?

Read More...

Tuesday, August 03, 2010

Tuesdays with Dorie: Carrot Cake Cookies

Huzzah! After a week of frantic unpacking leisurely opening a box or two at a time, the new kitchen is finally in workable condition. The best part is, it has a big window and enough room for a wee table on which to take photographs, so there'll be no more carrying food from the kitchen to the dining room to get pictures.

I'd like to say the first thing I baked was this week's TWD recipe, but the truth is I made these (fabulous) Snickerdoodle Blondies over the weekend, and then we scarfed them too quickly to get a picture. Moving on!

The second thing I baked were these Gingered Carrot Cookies, chosen by Natalia of Gatti Fili e Farina.
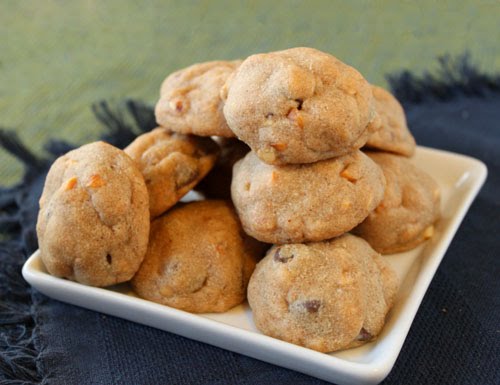
I added carrots, coconut, pecans, and dried cranberries to the mix, and I have to say, the dough was delicious. I found myself doing a little of the ole one-for-you, one-for-me trick when scooping it onto the baking sheets. After they were baked, they had a beautiful soft, cakey texture, with just enough carrots to make them seem healthy.

However, the next day, I thought they were leaning toward tasting a little stale, and a little plain. So I did what I always do when confronted with less than stellar baked goods: add frosting.

I made a simple cream cheese frosting and topped some cookies with a dollop of frosting and crushed pecans. I also tried a few whoopie-pie style, which worked out surprisingly well despite their bumpy texture.
My favorite variation was the cookies topped with the layer of frosting, because it had the maximum frosting-to-cookie balance.

These will probably never replace the classic chocolate chip or oatmeal cookie, but they were tasty and different, and I could see making them when I wanted a fun variation on carrot cake.

Q: What's your favorite cakey cookie? I've made some "banana bread cookies" that were...well, just what they sound like. Pretty fab! What about you?

Read More...

Monday, April 26, 2010

Tuesdays with Dorie: Chockablock Cookies

I was so glad that Mary of Popsicles and Sandy Feet picked Chocolablock Cookies for this week's TWD recipe, because after weeks of dueling with bundt pans and tart shells, I was ready for some good old-fashioned cookie love.

But it turns out these chockablock cookies are not your grandma's cookies.
These could also be called "Kitchen Sink Cookies," because they seem to contain everything but. In keeping with the theme of excess, I used as many ingredients as possible. Four kinds of nuts! Three kinds of dried fruit! Three kinds of chocolate! My only regret was not having multiple kinds of oats or coconut to toss in the mix as well.

On a scale of "somewhat" to "very awesome," I would rate these "quite tasty." (Okay, maybe the scale could use some tightening up.) They probably won't replace chocolate chip cookies as my ultimate comfort snack, but they were fun and interesting, and I loved the chewy texture and how every bite had something different.

My one complaint?

They're not so easy on the eyes. With all the add-ins, they're kind of homely little things, bumpy and craggy, hiding their pockets of chocolate instead of flaunting them. What's a photo-obsessed food blogger to do?

Well, I quickly figured out that I couldn't really force them to be more attractive. So then I thought that maybe they would look more delicious if they were presented next to something less so, like a nice refreshing goblet of broccoli:

This might work for confirmed broccoli haters, but I happen to like the green stuff, so it didn't quite work out. What if they were posed next to a huge furry novelty spider?

Well, they're the better looking of the two options, but I'm not sure this picture would pique anyone's appetite. Except maybe the spider's. He looks hungry. I do, however, think we have a winner when the spider is presented on a serving platter:

Coffee, tea, or me?

Yes, when faced with the choice between chockablock cookies or medium-rare furry spider, these cookies are the clear beauty pagent winner! Besides, who needs looks when you taste so good on the inside?

And a final story about these cookies: I made them the day before I had a big race coming up. I decided to make some extra-large cookies to have as a post-race victory meal, sort of a reward for all that running. So I chose the two most delicious looking cookies of the bunch, and packed them in my car to eat after the race.

Well, many hours later, I finished (yay!) and was ready for my big reward. I pull out the cookies, only to find two mashed, mangled discs pancaked together and fused by the powerful Southern California sun. These puppies had been simmering in the heat of my car for 10 hours and were barely recognizable as cookies. They were also extremely fragile and fell apart at the mere grazing of fingertips upon their surface.

So, in a supreme example of poetic justice, I was desperate to eat these ugly cookies--the cookies whose appearance I had already planned on mocking on the blog!--and they were too far gone to be eaten, at least with any semblance of manners or dignity. Wah-wah.

But don't worry, this story has a happy ending. There were plenty of homely but intact cookies waiting for me at home, and I learned a Very Important Lesson about not judging...or something like that. Mmm, cookies!

Read More...